Hobby Tip: Improve Your Miniature Painting Today With a Wet Palette

 Hobby Tradecraft, News and Info, Tabletop Gaming  Comments Off on Hobby Tip: Improve Your Miniature Painting Today With a Wet Palette
Jun 192014
 

I get a lot of questions about painting miniatures, specifically about things that new miniatures painters can do to improve the quality of their paint jobs. In my opinion there are three really important things that you can do to help yourself out. These are (in no particular order), brush control – which comes with practice, learning to thin your paints, and painting from a wet palette. Of these three I think using a wet palette is something any painter can do that is low cost and will have an immediate and significant impact on the quality of their miniature painting. Today I’m going to talk about wet palettes.

(Before we dive in I want to be clear that we’re talking about using water based acrylic paints here like Vallejo, Games Workshop, Reaper, etc)

Just What Is a Wet Palette and Why Do I Need it to Paint Miniatures?

Improve your miniature painting with a wet palette, hobby, tabletop

The wet palette in all of its simple, inexpensive yet supremely helpful glory

The default for most new miniature painters is to use a brush to get paint straight from the pot and to slather it on to your miniatures. This leaves a less than desirable finish as you tend to get the paint on very thick and it obscures some details. There are a lot of things wrong with this approach and I don’t want to get sidetracked so I’ll just say “don’t do that” in this article and leave it at that for now. We’ll revisit that topic in another post in the near future.

Some miniature painters may know not to dip brushes straight into the pot or they may be using paint that’s in dropper bottles so they’re using some sort of palette. Maybe one of these plastic ones or a piece of ceramic tile or even an old salad plate. This is a step in the right direction but you can do better. You can use what’s called a wet palette.
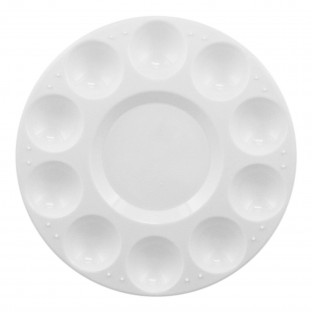
This is  a pretty typical multi well plastic palette. You should keep one around for special applications that you don't want on a wet palette, like washes.

This is a pretty typical multi well plastic palette. You should keep one around for special applications that you don’t want on a wet palette, like washes.

A wet palette is exactly what it sounds like, a surface to load and mix paints on but the difference is that it’s actually wet. This is accomplished by having a container with a sponge on the bottom that’s loaded with water and some paper on top of the sponge. This can be either special wet palette paper or some stuff you probably have around the house – more on that in a minute.

Using wet palettes will give you several key advantages. First of all when you load paint on to the wet palette it immediately sucks up a little water through the paper and thins out the paint. You’ll have a base to start from and then can experiment with the paints you’re using to find the right consistency. In some cases you won’t need to thin it any further, but this varies by manufacturer and even by color within a brand of paint.
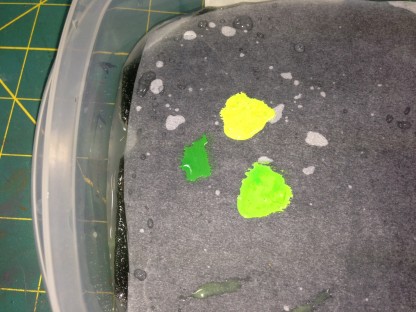
wet palette, paint, miniatures, hobby, tabletop,

A few dabs of water based acrylic paint on the wet palette. Note how it’s starting to spread a little as it picks up a bit of water – this is good!

Since your paints are now resting on a layer of moisture they will stay wet much longer than if you’d just loaded them onto a regular dry palette. This also means that you can leave paint on the wet palette, close it up and come back a few days later and your paint will still be wet and useable. (If you leave it there long enough it will separate some so you’ll need to give it a stir to rejuvenate it). An added bonus is that if your paint is in open pots they’ll last longer because you’re only opening the pots long enough to get some paint out. There is less exposure to air and less evaporation of the moisture in the paint pot thereby extending the life of your paint in the pots.

Using a wet palette also means you can combine paint colors side by side to get different gradients and blends when you’re shading. Also, if you’ve mixed up or blended a custom color you’ll be able to preserve that between painting sessions as it will stay wet when stored in the wet palette saving you time and the headache of remembering just what you did to arrive at that color you mixed up.
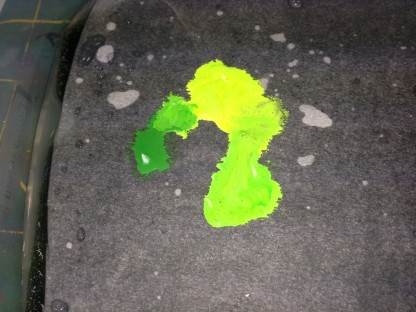
blending paint on a wet palette, tabletop, miniatures, hobby

This is just a quick (and sloppy) example of blending paint on your wet palette and it’s not completely blended together so you can get the idea of what I’m doing here… You can see how you can work up different color gradients easily this way

Where Do I Get a Wet Palette?

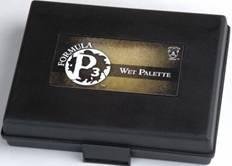
You can buy a complete wet palette that’s an airtight container, sponge and special paper for around $10 to $20. There are these Masterson Sta–Wet palettes which run around $10 or so at art stores like Michael’s, Hobby Lobby, etc. Or you can get one of these Privateer Press P3 Wet Palettes for around $20 at your FLGS or shipped right to your door from Amazon if you don’t have a local game store.

The P3 Wet Palette, usually  under $20 and perfect if you don't want to  build one yourself.

The P3 Wet Palette, usually under $20 and perfect if you don’t want to build one yourself.

If you’re on a budget or like to do stuff yourself you can easily build a wet palette, probably with stuff you already have around the house.

How Can I Build My Own Wet Palette?

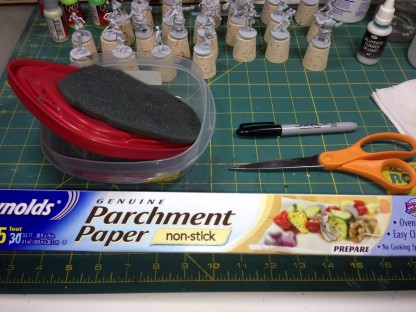
This is actually a pretty simple project that you can do in less than an hour. You’ll need to assemble the following items:

Airtight container – Tupperware, Glad or Rubbermaid containers. This can be glass or plastic, whatever you have as long as it’s got a good seal. Use a size that you’re comfortable with and have room for on your work surface. I use a sandwich sized box for my wet palette.

Sponge or some foam – You can use a sponge or even some of the foam that comes in miniatures blister packs packages. You want to cut this into the shape of your container so that it’s an even layer across the bottom. If you don’t have a sponge you can also use paper towels. Use a couple and fold them up so they fit in your container. Trim as needed. (Here’s a link to some purpose made Masterson Sponges)

Parchment paper – If you don’t know what this is, ask your wife or s/o (or mom). It’s also called baking paper. This is different from wax paper. (You can use wax paper in a pinch but I don’t recommend it. Parchment paper just has different properties for passing moisture through it and is significantly better for this application) If you don’t have any parchment paper look in the grocery store section where they sell plastic wrap and aluminum foil, you’ll find it there and it costs around $3 for a box that will last you a LONG time.

Water – this can be tap water but if your water is hard/has high mineral content then use some distilled water. Bonus: you need to wash the sponge and change the water occasionally, using distilled will keep the water from getting funky longer and is better in your paints anyway.
make a wet palette, tabletop, hobby, miniatures, painting

This is all you need to make a wet palette. An airtight container, a sponge or foam, some parchment paper and some water. Simple and cheap!

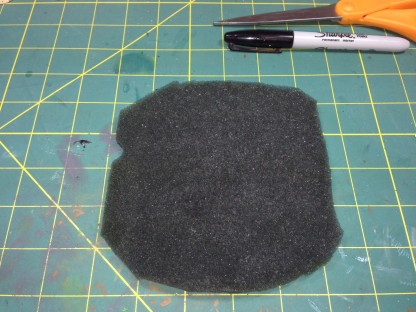
Here’s how you make your wet palette. Dampen your sponge. This is because if you use a dry sponge it will swell when you wet it and expand. Just run water on it and then wring it out so it’s the size it will be when wet. Turn your container upside down and lay it on your sponge so you can trace around it (assuming you’re using a sponge or foam that’s larger than your container). Trace around and then cut out your sponge or foam – cut inside the lines of the dimensions of your container, this doesn’t have to be perfect but it should be reasonably close.
wet palette, tabletop, miniatures, hobby, painting

I used a piece of foam from some packaging or an old miniatures case. You can use a sponge or even folded layers of paper towels for your wet palette

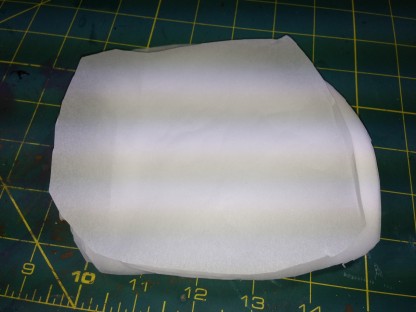
Next tear off a half dozen or so pieces of parchment paper that will fit in your container. It’ll probably be twice as long as your container if you’re using something like a sandwich sized box. If that’s the case just fold it over so you have a pad of parchment paper. When you cut it to fit the shape of your container make sure you cut the folded part off so all the sheets are loose. Lay your container on the stack of paper and trace it. Cut the paper along the inside of the line you traced so it fits in the container nicely. You will now have enough pre-cut parchment paper to last you awhile.
wet palette, hobby, miniatures, tabletop, painting

Here’s the parchment paper cut out roughly in the shape of my container. It doesn’t have to be exact. Trim so it lies flat on the sponge.

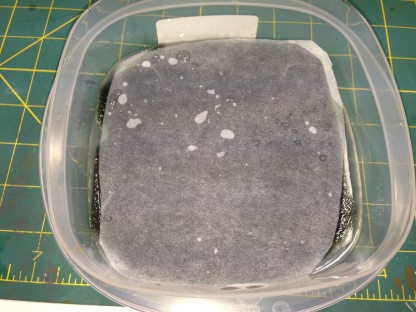
Next up put the sponge in the container, and fill it with water to the top of the sponge. Lay a sheet of the parchment paper right on the sponge and it will absorb some of the water but reach a sort of equilibrium where it’s wet but doesn’t disintegrate or pass a lot of water through. This is the surface that you’ll load with paint and dip your brush into when loading it.

One last trick here – you can actually store few sheets of the pre-cut parchment paper under the sponge so that they are pre-wet when you’re in the middle of a painting session and need to change the parchment out because you’ve used it up.

A Wet Palette Will Help You Become a Better Miniature Painter

wet palette, hobby, miniatures, tabletop, painting

Good miniature painting is something that takes trial and error and lots of practice. Using a wet palette isn’t a shortcut but it is one of the few things that will be a total game changer for you and your painting. It’s also something that really delivers a lot of bang for your buck. When someone asks me how they can improve the first thing I ask them in return is “are you using a wet palette?”. If they’re not then this is always my first recommendation and invariably people get immediate, positive results.

As always, feel free to leave a comment below, I’d like to hear from you an appreciate constructive discussion.

Jun 052014
 

You’ve probably realized that miniatures hobbyists are a fairly diverse group and while there are a lot of tried and true tricks of the trade there’s also a lot of varying opinions about how to get things done. One thing that the entire community is in agreement on though, is that you need good lighting and lots of it when you’re working on miniatures and models. Particularly so when painting.

One bit of advice that’s often repeated is that you should be using a daylight bulb in your lighting setup. This gets mentioned a lot but unfortunately no one usually bothers to explain what exactly a daylight bulb is and why you should use one. Today we’re going to do just that.

Just What the Heck is a Daylight Bulb Anyway?

This is probably the reaction some people have when hearing the phrase "daylight bulb" for the first time...

This is probably the reaction some people have when hearing the phrase “daylight bulb” for the first time…

The term “Daylight bulb” usually refers to the actual lamp in your desk light, in particular the color temperature or Kelvin (K) value. Without getting overly technical here we’re not talking about the wattage of the bulb but the actual color temperature of the light that the bulb gives off.

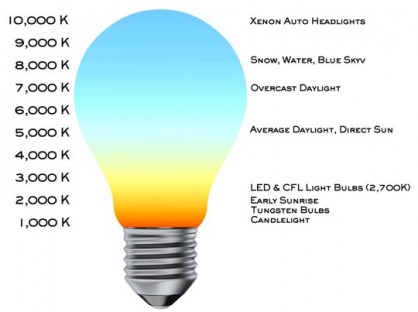
All bulbs have a K rating. Bulbs with a lower K rating will give off a more yellow colored light. As you go up the K rating scale the light becomes bluer and brighter. Your typical CFL light bulb around the house is probably in the 3000K to 4000K range. These typically have labels like Soft White, Warm White or Cool White. Candlelight is around 2000K or less, with the older incandescent bulbs coming in around the mid 2000’s.

Here's a reasonable example of what the  Kelvin (K) rating actually indicates over its range when it comes to light bulbs

Here’s a reasonable example of what the Kelvin (K) rating actually indicates over its range when it comes to light bulbs

At the other end of the spectrum we have bulbs that are considered Natural Light and these clock in around 5000K. Daylight bulbs are typically right around 6500K and simulate the suns light at mid day on a slightly overcast day. When people refer to Daylight bulbs this is the sweet spot (6500K) although you will see some bulbs marked as Daylight that are around 6000K.

Why Should I Care About Daylight Bulbs?

Are feeling kind of like Homer when it comes to Daylight bulbs? Don't worry, it'll all make sense in a minute!

Are you feeling kind of like Homer when it comes to Daylight bulbs? Don’t worry, it’ll all make sense in a minute!

There are several advantages to using Daylight bulbs. They give you close to ideal natural light so that the colors you are seeing aren’t distorted by the typical yellowy light source found in most homes and office or desk lamps. Daylight bulbs are commonly used by artists and designers who need to see colors in as close to natural lighting conditions as possible. This will help you accurately reproduce the colors you want when you’re painting miniatures, model kits and scenery.

Daylight bulbs will appear brighter even though they may be the same wattage as a lower K rated bulb. This will help you pick out details and see things better when you’re working on the small details and things like mixing and blending or shading paints.

Lastly, working under Daylight bulbs is actually easier on your eyes. This will allow you to work longer and with less eye strain than with more yellow, lower K rated lighting.

Where Do I Get Daylight Bulbs?

Ok, sounds good. Where do I find Daylight bulbs?

Ok, sounds good. Where do I find Daylight bulbs?

The nice thing about Daylight bulbs in 2014 is that they’re readily available. Finding these used to be kind of a hassle but over the last few years finding Daylight bulbs in a variety of packages has become fairly easy. They are available in most sizes of fluorescent tubes as well as CFL bulbs. Most brick and mortar hardware and lighting retailers carry a selection of Daylight bulbs and they can of course be found at Amazon and online specialty lighting shops. You’ll also be pleased to find that Daylight bulbs aren’t typically any more expensive than lower K rated bulbs – and if they are more expensive it’s usually only about a 10 to 15 percent premium. You may even be able to find Daylight rated LED lighting although that is still pretty pricey and not widely available.

Here’s a search results page at Amazon for various types of daylight bulbs.

Have something to add or a helpful tip? Feel free to share it in the comment section below. Thanks for stopping by and see you next time!

Images: 1 2 3 4

May 282014
 

Something that I get asked a lot when I’m talking miniatures is what glue to use for various projects. For a lot of folks coming in to the miniatures hobby, glue is almost an afterthought, something you throw in to the pile of stuff you’re buying at checkout. For others it can be a mystery, meaning they’ve seen a bunch of different glues but aren’t sure what they should use for the miniatures or model kit they just bought. The truth is there are lots of different types of glues and they have different uses depending on what miniatures or models you’re assembling.

Lots of model and miniatures glue

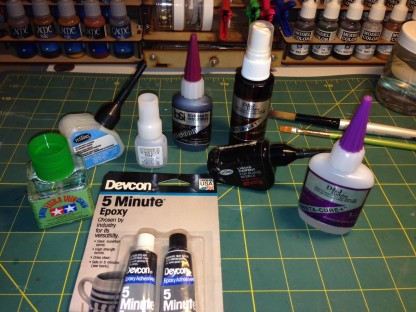
An avalanche of adhesives!

Miniature and Model Glue Basics

Not all model glues are the same, in fact there’s quite a bit of variety. There’s also variety in how these are dispensed or applied. One of the key things when choosing a glue for your project is knowing what material you’re going to be assembling. Different types of plastics and resins will require different glues. Look at the package for the item you’re assembling, some manufacturers will suggest what you need for assembly. If you’re not sure, check the manufacturers website or one of the many forums dedicated to hobby modeling and miniatures. You can also ask the resident expert at your Friendly Local Game Store, he or she will probably be happy to talk to you and answer your questions.

One of the most important rules about using glue is, “less is more”. Use glues sparingly, you want to bond parts to parts and using a thin film of glue will accomplish this. If you get too much glue on your parts you’ll end up gluing large blobs of glue to each other. This will result in a poor bond and the parts not fitting together correctly. Too much glue can also etch or warp the plastic, depending on the material and the glue you are using.

Prepare your miniatures surfaces. There are three keys to preparation: clean, test fit, and surface preparation. Most miniatures and models use a mold release agent to make getting the parts out of the molds an easier process. This release agent can be greasy or powdery. The release agent will interfere with glues and it’ll also prevent paint from sticking to the models when you get to that stage.
It’s recommended that you wash parts in warm soapy water – dish washing liquid is fine for this with plastic and metal models. For resin models you will need to use something more powerful like Simple Green or Fabuloso (I think Fabuloso is the Mexican version of Purple Power, I get it at the local Mexican market. It’s cheaper than the name brand stuff and works just as well). After washing, make sure parts are completely dry before gluing them.

You’ll want to dry fit your parts before applying glue. This just means putting the parts together without glue so that you understand how they fit together, that it’s a tight fit, and that you get an idea of where the best places are to apply glue. Lastly you’ll want to do surface prep like removing any burrs or sprue gates/mold lines that will get in the way of a tight fight or be difficult to access after the parts are glued together. (Sprue gates are the bits where the part is attached to the sprue so that the material can flow into the mold during manufacture.)

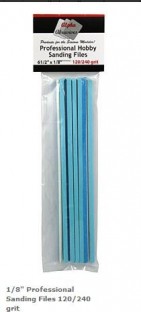
Sometimes with very smooth parts it’s a good idea to rough up the surfaces where the parts will join in order to get a better surface for the glue to bond the parts. You can do this with your needle files, small emery boards or even an X-acto knife.

These small sanding sticks/emery boards are really handy for surface prep on miniatures and model kits

These small sanding sticks/emery boards are really handy for surface prep on miniatures and model kits

When applying glue, use a tool that gives you good control of your glue. This can be a needle applicator tip, a brush or even something as simple as a toothpick. As mentioned above you want to apply glue sparingly. Squirting it out of a tube is probably the worst way of applying glue. If tube glue is what you have, squirt a little bit onto some wax paper and then use a toothpick or cheap brush to apply it to the parts.

Types of Glue I Use

I actually have a large assortment of glues because there’s no such thing as “One Glue to Bind Them All”. I’ll go through the types of glue I use and what I use them for. As a general rule you’re going to use model cement for most plastic miniatures and model kits that are made of styrene or ABS. You’ll use Crazy Glue/Cyanoacrylates (aka CA) for resin models and some softer “bendy” plastics – this is where you’ll need to check with the manufacturer if you’re not sure. Those heavy duty large model kits may require some two part epoxy or extra thick CA. Last but not least you’ll want some PVA/Elmers White Glue for basing and scenery materials.

Crazy Glue/Cyanoacrylate (CA)

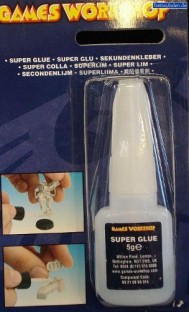
I have several different types of CA and use each one for different applications. I use a thin CA for general assembly of small resin miniatures and some small metal parts as well. I recommend you get one with a built in brush applicator. The brush gives you a lot of control and allows you to put the CA only where you need it. I recommend Games Workshops “Super Glue Thin” product. It’s easy to find and easy to use. The packaging ensures that the brush comes out of the bottle loaded with a moderate amount of glue and the GW product is widely available at game and hobby stores.

Game Workshop Super Glue Thin is widely available at hobby shops. Loctite also makes a thin superglue with a brush applicator.

Game Workshop Super Glue Thin is widely available at hobby shops. Loctite also makes a thin superglue with a brush applicator.

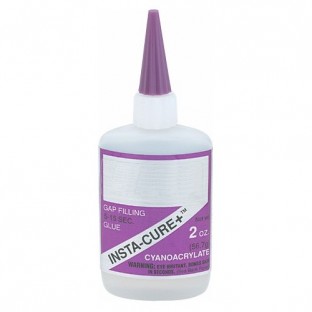
I also use a thicker gap-filling CA, Bob Smith Industries Insta-Cure+ for spots where I need some extra strength or to fill a small gap. Using a thicker CA can also give you better control of the glue when you’re applying it. CA’s go from very thin all the way up to gel like consistency. You can experiment with these various thicknesses to see which you are most comfortable with. This particular product has a plastic tip that you cut open on first use so just cut the very tip of it off so you have a small opening. If the tip gets gummed up you can buy replacement bottle tops and caps. (Another use for the thicker CA’s is as a gap filler. You can run some thick or gel type CA into a gap between parts and when it sets you’ll be able to sand and finish it so that it completely hides the gap. You can use an Accelerator to speed up the curing process – more on Accelerators below)

Bob Smith Industries Insta Cure+ is my preferred CA.

Bob Smith Industries Insta Cure+ is my preferred CA.

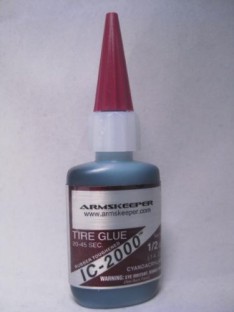
For places where I really need a strong bond, for example, large kits with heavy wings or that have heavy metal add on parts I use Bob Smith Industries IC-2000. IC-2000 is a CA that has had very finely ground black rubber added to it. I have used this to secure things like dragon wings to large metal models and it is very strong. I’ve dropped stuff that is glued together with IC-2000 and the actual metal snaps off close to join but not the joined parts. This stuff is really just for specialized applications but it is handy to have around.

Bob Smith Industries IC-2000

Bob Smith Industries IC-2000

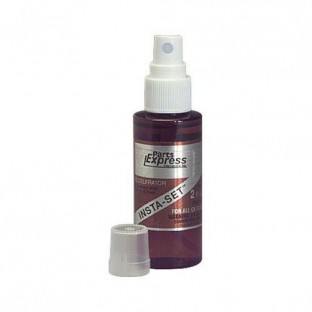
The last two CA products I keep around are BSI Insta-Set Accelerator and BSI Un-Cure Debonder. The Insta-Set is an accelerator. You can use it to speed up the curing process for CA’s but be aware that a bond using accelerator will be less strong than one without. Another use for accelerator is quick curing when using CA to fill a gap. You run a bead of CA over the gap and the spray the accelerator over it to cure it immediately. Accelerator creates a chemical reaction and the by product is heat. This reaction can get VERY hot so be careful about having glue on your skin when using this product. Accelerator can also etch styrene plastic so use it sparingly.

Bob Smith Industries Insta Set Accelerator

Bob Smith Industries Insta Set Accelerator

Un-Cure is a CA debonder. You can use this product to dissolve the bond between parts or remove CA from your skin. Use debonder sparingly as it can soften plastic parts.

CA Tip: The reason CA’s are so good at bonding skin is because that was their original purpose! If you apply some lotion to your hands before working with CA it may help you by making any CA you get stuck to yourself a bit easier to remove. It won’t completely prevent it from bonding to you but may make cleanup a bit easier.

Model Cement and Solvent

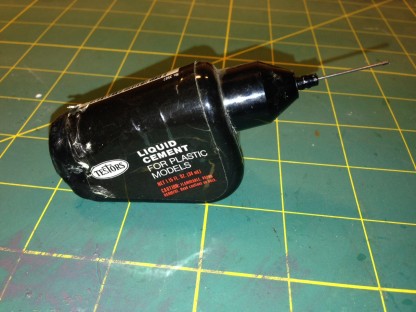
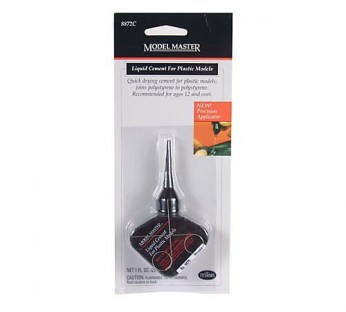
There are lots of types of model cement. My biggest issue with this is how you apply it. Because of that I have a favorite product for those just starting out. This product is Testors Model Master Liquid Cement. This product comes with a steel needle tip allowing for very precise and controlled application. This has been my go-to model cement for at least a decade, possibly longer. The tip rarely clogs because it’s steel and any dried glue just peels away. The package does include a couple of fine wire tip cleaners for the rare clog. (There’s a similar Testors product “Quick Dry Cement”. This does not have the steel tip so make sure you get the Model Masters cement.)
The Testors Model Masters Cement with the steel needle applicator gives you great control over the amount and placement of glue on miniature & model parts

The Testors Model Masters Cement with the steel needle applicator gives you great control over the amount and placement of glue on miniature & model parts

The other Testors product I use is Model Masters Clear Parts Cement. This is formulated differently so it won’t etch or fog up clear parts like cockpit canopies or windows. Highly recommend this product as there’s nothing more aggravating that putting a ton of work into a kit and then having the windows get fogged by cement.

Model Masters Cement - this one's got the steel needle applicator tip

Model Masters Cement – this one’s got the steel needle applicator tip

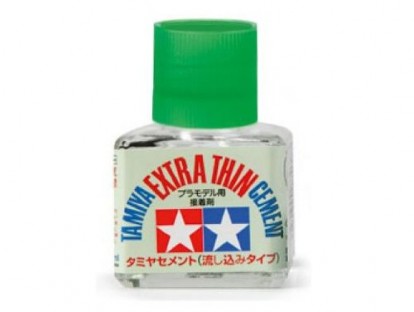
The last type of model cement I use is more of a solvent. It’s very thin and has a brush applicator. I typically lay the brush at the join and allow the glue to wick it’s way in between the parts. This glue actually melts the plastic a bit so that the parts fuse together. I love this stuff because it enables me to get a really good join and a tight fit on parts that have been correctly prepped. I have been using Tamiya Extra Thin and I really recommend this particular product.

Tamiya Extra Thin Cement

Tamiya Extra Thin Cement

Model cements and solvents should be used sparingly as they can warp, soften or etch plastic. Quick tip: the thin cements and solvents are volatile and will evaporate quickly. Use with good ventilation and keep the lid on tight. If you forget to put the lid on you may return to a mostly empty bottle the next day!

2-Part Epoxy

I occasionally use a 2-part epoxy like Devcon or JB Weld. Just be aware of the short working time – I use a five minute epoxy and make sure you mix this thoroughly. I don’t recommend using anything with a quicker setting time than five minutes as you’ll invariably run up against the clock and that can be frustrating. Also, look at the package and see what you need for cleaning this up BEFORE you start mixing. You’ll want to be ready for clean up immediately upon finishing with this product.

PVA aka Elmers Glue

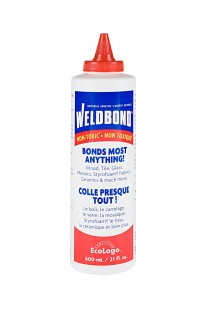
PVA is Polyvinyl Acetate, commonly known as Elmer’s Glue. You’ll want some of this for basing. Thin it slightly with water and apply it to your base with a brush, then add your basing material to the base. Once your basing material has dried completely you can paint a thinned coat of PVA over it to seal it on to the base. Some good alternatives to Elmers are Weldbond and Aleene’s Tacky Glue. Aleene’s can be particularly useful on bases with a slick surface. (Don’t forget that for slick surfaced bases you can also rough them up a bit before applying glue to help give the glue something to bond with).

Weldbond Glue - I keep this around because I use it a lot for large terrain projects as well

Weldbond Glue – I keep this around because I use it a lot for large terrain projects as well

Before we wrap up I want to mention that I have not talked about pinning models in this post at all because that is another lengthy subject that should have it’s own article. I’ll be putting together a guide for pinning models in the near future but in the meantime you can check this article for some thorough information on what you’ll need to have when we talk about pinning models.

As always, the way I talk about doing things and what I use is based on a my own history of building models and miniatures. These are the products I use and the ways I do things but they are by no means the only way of doing things. If you’d like to contribute an idea or an opinion of a product that you like, feel free to do so in the comments section below. Constructive dialog is always welcome here!

Miniature & Modeling Hobby Tools – More Essentials

 Hobby Tradecraft, News and Info, Tabletop Gaming  Comments Off on Miniature & Modeling Hobby Tools – More Essentials
May 092014
 

The last couple of posts here have been about not spending absurd amounts of money on your basic tools for assembling and finishing miniatures and model kits. If you read “How To Save $100 On Hobby Tools” then you’ll recall that I mentioned I’d recommend  some other tools beyond the basics that you’ll probably want to add to your hobbying tool box with some of the money you’ve saved. Today we’ll take a look at a few items that I think are good choices for expanding your hobby tool set.

The following items are things that I use on a regular basis and are the tools I’ve come to rely on after a couple of decades of building miniatures and models. While there are a couple of essentials, you probably don’t need to run out and buy all of this stuff at once. I’ll offer up some suggestions and provide links to where you can purchase those items, usually on Amazon for convenience sake and because lots of items there ship free or free with an Amazon Prime membership.

Self Healing Cutting Mat

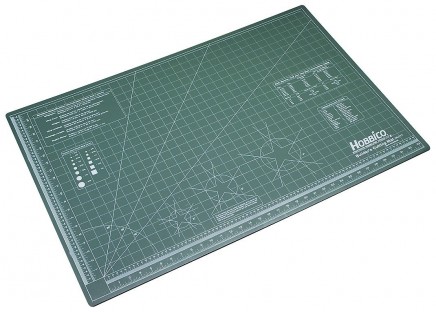
This particular item is pretty much your first additional must have. It’ll keep your work area from getting damaged by your tools, paint and glue. This is especially important if your work area happens to be your wifes (or moms) dining room table. Get a self healing cutting mat and get the largest one you can reasonably use (and afford) for the space you’re usually working in. Measure! I use an 18” X 24” mat which generally gives me a lot of room. I also have a small one that’s about 6” X “10” or so that I can throw in a bag if I’m putting together a little travel tool kit for a demo or a group build at my local FLGS.
Set yourself up with a cutting mat - particularly if your work area is the dining room table!

Set yourself up with a cutting mat – particularly if your work area is the dining room table!

Let There Be Light

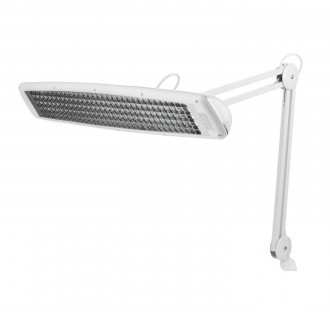
The next item you’re going to want is a good light over your work space. These days Ott Lights seem to be all the rage but I personally don’t care for them other than the fact that they’re compact and somewhat portable. I use a pair of swing arm desk lamps with daylight bulbs that I got from Ikea a few years ago, unfortunately those are no longer available so I can’t recommend the exact ones I  have. If  you have an Ikea nearby, it’s worth braving the crowds there to check out their selection of desk and office lighting as they have a large variety of stuff. (It’s also a great place to find a workbench/desk and shelving or display cases for your hobby/game room.) Another lamp that is very popular with miniature painters is the LSF 150 but these also seem to be somewhat scarce. A friend of mine uses this Daylight Triple Bright Lamp and has been very satisfied with it. It’s available at Amazon but it’s a bit pricey. It does however, ship for free.

The Daylight Triple Bright Swing Arm Lamp

The Daylight Triple Bright Swing Arm Lamp

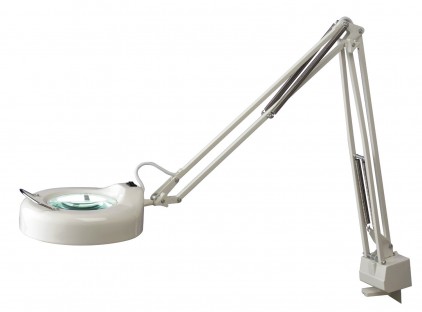
Another alternative is a lamp with a built-in magnifier. These are pretty easy to find and Harbor Freight Tools even carries one. These come in both fluorescent and LED styles. If you buy fluorescent, you’ll want to replace the supplied bulb with a daylight bulb. Unfortunately I can’t speak much on whether or not the LED lamps are a good fit for this kind of work as I don’t own one and haven’t worked with one either. Whatever you decide, I recommend getting a lamp with a long swing arm that clamps to the edge of your desk if possible. This will give you a lot of freedom to position the lamp head where you need it and can save valuable real estate on your workspace, particularly if it’s a small area to begin with.

One last tip, check your local Staples/Office Depot type office supply store, they typically have a good assortment of lamps that you can check out before you order one online. You may also get lucky and find a sale/markdown item that’s just right!

Typical swing arm Fluorescent Lamp with desk clamp - Make sure you get a daylight bulb for this.

Typical swing arm Fluorescent Lamp with desk clamp – Make sure you get a daylight bulb for this.

A Clear View

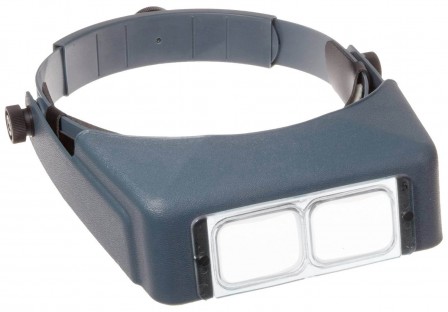
This next item is optional and also somewhat dependent on you and your lighting choice and work situation. If you’re an older gamer/hobbyist you’ve probably noticed that those tiny details are probably getting a bit harder to see. I find myself getting a lot more squinty these days so I’ve had to look for some solutions. I was using a set of cheapo drugstore magnifiers/reading glasses and then stumbled across the Donegan OptiVISOR. This is a magnifying visor with an adjustable headband that you can wear over your prescription glasses if need be. The lenses are replaceable and you can buy several different sizes of magnification. These take a little getting used to but once you have them fitted correctly you hardly notice they are there and the visor part moves independently of the headband so they can be flipped up out of the way if necessary.

Donegan OptiiVISOR with replaceable lenses

Donegan OptiiVISOR with replaceable lenses

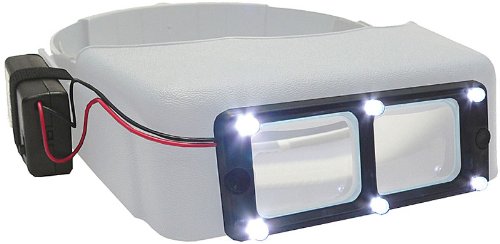
There’s also an accessory for the OptiVISOR that I really like. It’s an LED light kit that attaches to the lens plate and has 6 bright white LEDs that really throw some spot illumination on your subject for those times you need to see some up close detail. This accessory comes with everything you need to mount it and it only takes about 5 minutes to install. It’s powered by double A batteries which are easily replaceable. Once you’ve installed this you don’t notice that it’s even there, until you need it. This gives you portable light when and where you need it and can easily be throw into a travel tool kit if you need to.

The OptiVISOR LED Light Attachment

The OptiVISOR LED Light Attachment

Razor Saw

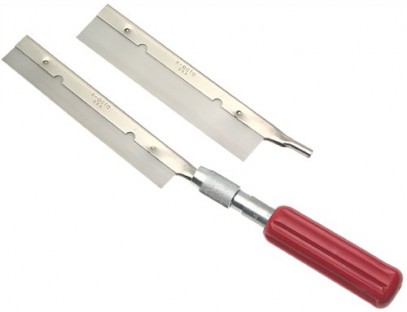
Another tool I like to have around is a Precision Razor Saw. Some of the tasks you’ll use this for will be cutting parts off of thick resin sprues, cutting molded bases off of miniatures or customizing and kitbashing models. These aren’t too expensive and if you purchased a knife set with a large handle you can just buy these X-Acto blades separately. If you’re going to be sawing wood or plastic for terrain construction or kitbashing, consider adding a mini miter box to go with your saw.

X-Acto Razor Saw Set

X-Acto Razor Saw Set

Motoring Along

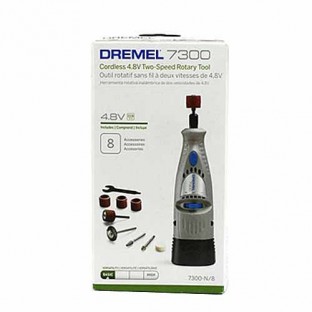
You may be considering adding a Dremel type tool to your kit and I think that can be a handy tool. Keep in mind that those things run at high speeds and can quickly damage what you’re working on or get away from you. For that reason I really like the Dremel MiniMite. The MiniMite is a cordless version of the Dremel that fits well in your hand and runs at a slower speed, making it easier to control. It’s also portable and rechargeable. It accepts all of the usual Dremel rotary tool accessories as far as I’m aware. The best part? It’s only about twenty five bucks on Amazon and ships for free.

Dremel 7300- N8 MiniMite Cordless Rotary Tool

Dremel 7300- N8 MiniMite Cordless Rotary Tool

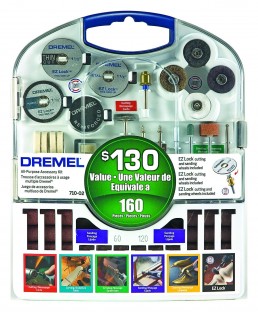
If you think you’d like a larger, more powerful, yet still portable tool, check out the Dremel 7700 Cordless Moto Tool. The Dremel 7700 does cost about twice as much as the MiniMite though. You’ll want to accessorize your Dremel with some attachments so check out a couple of the accessory kits, I have this 160 Piece Dremel Accessory Set which covers pretty much any eventuality.

This Dremel 160 piece accessory set probably  covers every task you're going to want to do with a moto tool

This Dremel 160 piece accessory set probably covers every task you’re going to want to do with a moto tool

Hold On!

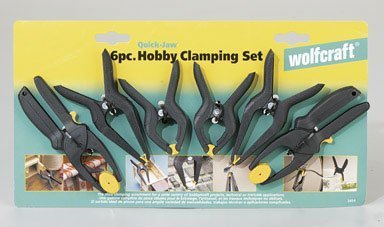
Sometimes you wish you had a third – or fourth – hand. There are a couple of tools you can get that are almost like having some extra hands around to help you out. The first one is some small spring clamps. I have some similar to these Wolfcraft Hobby Clamps that I picked up a long time ago. My only complaint with the set I have that they are a bit stronger than I’d like and they’re all exactly the same size and shape. This Wolfcraft set actually includes some different styles of clamp and looks a little more suited to what we’re doing. I’ve ordered a set and will post my thoughts on them after I’ve had a chance to work with them some.

The Wolfcraft Hobby Clamp Set comes with a variety of different style clamps that will come in handy

The Wolfcraft Hobby Clamp Set comes with a variety of different style clamps that will come in handy

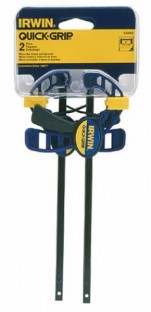
The next item is also a clamp but it’s a larger, different style of clamp that you may need if you’re making terrain or assembling some of the larger model kits like tanks, flyers, or laser cut buildings. This is a sliding bar clamp that comes in a mini size with a maximum four inch jaw opening. It’s just the right size for a lot of larger hobby projects without being ungainly and taking up your whole desk. These are available at Amazon in a two pack but hold the phone – Harbor Freight carries these for a mere two bucks apiece and you can buy them indiviually. I’ve looked around the ‘net and I haven’t found anywhere cheaper than these. Worth a stop by your local Harbor Freight if you have one nearby.

Micro Bar Clamps - these are great for holding larger models or terrain projects together while gluing and assembling

Micro Bar Clamps – these are great for holding larger models or terrain projects together while gluing and assembling

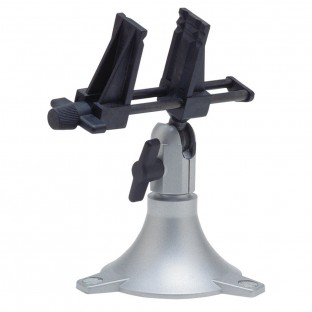
The last “third hand” type item I’m going to recommend is a little hobby vise with a set of wide jaws. This is the PanaVise Model 201 Junior and it has a nice solid base, fine controls for adjusting the vise jaws and it tilts and pans every which-way. You can also get a couple of different attachable bases for this vise. There’s a wider base that has little parts trays around the circumference and there’s also a vacuum base version of the PanaVise Junior that’ll keep the vise from sliding around on your desk/work surface.

The PanaVise Junior Miniature Vise

The PanaVise Junior Miniature Vise

The Brush Off

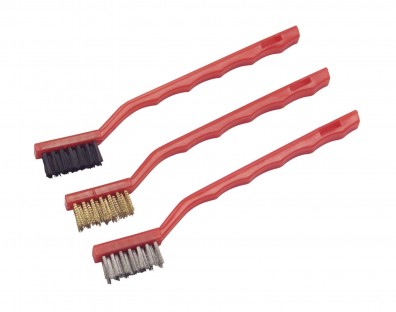
Last but definitely not least, you should probably pick up a couple of small brushes for clean up. These are handy for cleaning up your needle files if they get jammed up with the shavings from cleaning and smoothing model parts. I have a three piece mini wire brush set like this one. It includes a nylon, brass and steel brush. I’ll be honest with you, the steel brush is usually overkill for most hobby projects so I don’t use it much but the brass and nylon brushes have really become essential tools for cleaning other tools and miniatures.

This Mini Brush Set is great for those little cleanup jobs

This Mini Brush Set is great for those little cleanup jobs

There are probably a few other items that I could mention but these items are among the most frequently used in my experience. I think the two key items in this list are the cutting mat and good lighting. You’ll probably want to start with those and then add the other items as you need them.  As always, if you’d like to add a helpful tip or observation, feel free to do so down below in the comment section or find me on Twitter @HolyCrapItsLate. Next time we’ll take a look at the stuff that holds things all together, glue!

May 022014
 

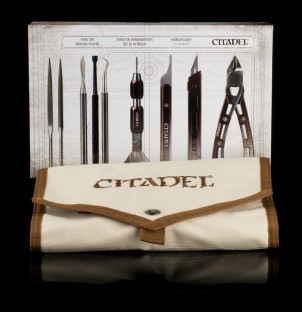
Last week we took a look at Pin Vises and I talked about how to get a complete miniature pinning kit for around $25 instead of throwing money away on an  overpriced Games Workshop Drill Set. I mentioned in that post that there were some other approaches to getting yourself a complete set of hobby tools that don’t require you to shell out $150 for Games Workshop/Citadel branded stuff.

Now don’t get me wrong here, I’m not a “GW Hater”. To the contrary, I’ve been playing GW games for 20+ years and I really enjoy the worlds they’ve created, warts and all. My issue is that hobby gaming is already a fairly expensive pastime that has a way of sneakily “nickel and diming” you into spending more than you think you will when you start out. It seems crazy to me to blow the insane amount of cash on tools that GW tries to convince new miniature hobbyists that they should spend. GW gets away with this because people coming into the hobby sometimes don’t know any better.

The Games Workshop tool set that you don't need to blow $150 on

The Games Workshop tool set that you don’t need to blow $150 on

A Word About Methods and Tools

This article is based on my experiences building miniatures and models over a couple of decades. I’m not claiming that my way is the only way, just showing you how I do things. One of the best things about this hobby is the community and how folks are willing to share their techniques and tricks of the trade and I sincerely hope you find something useful here. I welcome your input and observations so feel free to add anything you think is helpful down below in the comment section.

Before we get started, a quick word about tools. I’m not a tool snob, nor am I a frugal gamer (can anyone in this hobby really be considered frugal?). Since this article is about getting the most bang for your gaming buck I will be recommending some fairly inexpensive items. A few of them will be from Harbor Freight Tools. Some folks think anything from Harbor Freight is junk and to be fair, if I was a contractor or a mechanic I probably wouldn’t rely on some of the stuff they sell. However for the purposes of what we’re doing Harbor Freight Tools is a great place to shop for hobby tools. For convenience, I’ll also link to similar items that are available on Amazon.

The Basic Tools Every Beginner Needs

To get started you’re going to need a few basic items like a knife set, some files, and a sprue cutter. These items are your core tools and what you will rely on most of the time.

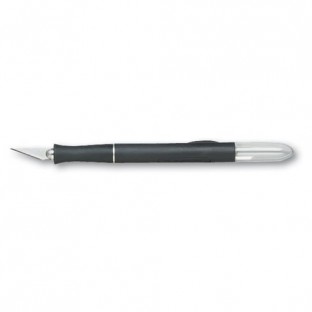
This is an X-Acto X2000 Comfort Grip Knife with a #11 Blade and it's less than $6

This is an X-Acto X2000 Comfort Grip Knife with a #11 Blade and it’s less than $6

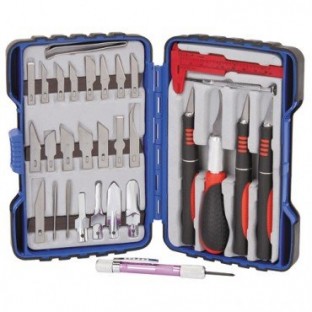
For knives it’s pretty straightforward, you’ll need a basic X-Acto style handle and some number 11 blades. Games Workshop sells one of these that also includes 5 replacement blades for $25 and to be quite blunt, that’s outrageous. If you’re shopping for a hobby knife you can either buy just a knife and some blades for around $10 or you could go with one of these Xacto Basic Knife Sets that’s got not one but three different handles and a variety of extra blades. The Amazon price for this is $16.29. Harbor Freight carries a 33 Piece Deluxe Hobby Knife Set that’s usually priced at $15.99 but is currently on sale for 13.99. The Harbor Freight set also includes some useful additional items like tweezers, a scratch awl, calipers and some tiny screwdrivers. You can also find the Harbor Freight set on Amazon here.

The Gordon 33 Piece Deluxe Hobby Knife Set with Carrying Case and a slew of  extras. Available at Harbor Freight Tools and Amazon

The Gordon 33 Piece Deluxe Hobby Knife Set with Carrying Case and a slew of extras. Available at Harbor Freight Tools and Amazon

One last knife set I want to mention is this Mastergrip Craft & Hobby Knife Set. I mentioned this via my Twitter account last week and Costco has had these for quite awhile. It now looks like they’re no longer available at Costco.com and are on clearance at the warehouses. This set was $20 and at my local warehouse it is now on clearance for $13. Twitter friend @D3FFDR3AD found the same set at his local Costco for 10 bucks! These probably won’t be available at Costco for much longer but it’s worth a look at your local store if you happen to be a member.

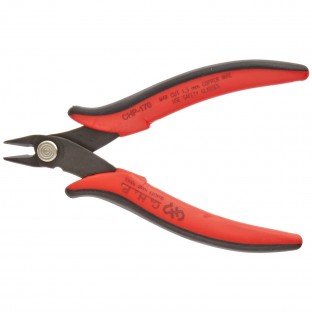
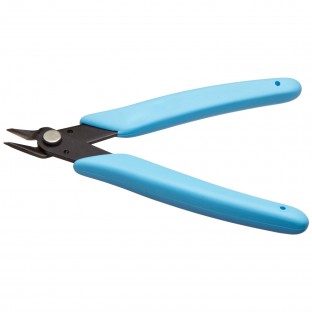
Next up, you’ll need a set of cutters to clip all of those parts away from their sprues. Once again, Games Workshop has a set on offer for the astronomical price of $30. But they’re “precision made from stainless steel and have bypass micro-shear blades”…right. They’re angle cutters and you can get some for under $10. In fact unless you’re set on a name brand tool you can get a set of these for way under $10. Check these Hakko CHP-170 Micro Clean Cutters available on Amazon for $4.37! These will do the job and have the right angle to get at those tiny parts cleanly. Over at Harbor Freight you can get these Micro Flush Cutters for three bucks, I’ve seen these on sale there for $2 bucks on occasion and I don’t think you can beat that price anywhere.

Hakko CHP-170 Micro Clean Cutters Sprue Cutters

Hakko CHP-170 Micro Clean Cutters

Update 5/7/14: It’s been suggested to me by more than one reader that I mention these Xuron 170-II Micro-Shear Flush Cutters as these are widely available in lots of hobby and game shops and are a popular choice among hobbyists. At the gamer friendly price of only $7.68 they are also another great deal in comparison to the Citadel Cutters.

Xuron Micro Shear  170-II Flush Cutters

Xuron Micro Shear 170-II Flush Cutters


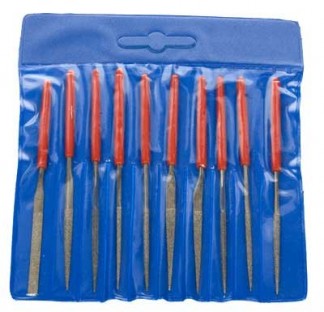
Lastly as far as basic tools go, you’ll need some files for mold line removal and prepping parts where they join together. Games Workshop is happy to empty out the rest of your wallet to the tune of $18 for a pair of needle files, but these files were probably blessed by the Emperor or something so you know, premium pricing. OR…you could get a set of these non-consecrated needle files that come in a pouch and have handles, and did I mention this is a ten piece set? It’s $7 on Amazon. That’s 10 files in various shapes with plasti-dipped soft grip handles. Harbor Freight also has some needle file sets (probably imported from the Eye of Chaos, but whatever) that are dirt cheap. There’s a set without handles that’s $3.49 and a set with plastic handles for $4. Both of these also come in a handy vinyl pouch.

The SE 10 Piece Needle File Set

The SE 10 Piece Needle File Set

The Extra Bits

For completeness, there are a few other tools that you should eventually get but they aren’t strictly necessary for beginners. First up is the Mouldline Scraper – once again GW has one of these, and it’s $17. This tool is strictly optional and to be honest, you don’t need it. It does the same thing your file set does and if you bought one of those knife sets I mentioned above that come with multiple handles and blades you can designate one of those as your mouldline scraper. Personally I use the back of a knife for most of these tasks. If you absolutely have to have a tool like this then I recommend this Squadron Products Seam Scraper. It’s 10 bucks which still feels a little pricey to me, your mileage may vary.

Squadron Products Seam Scraper

Squadron Products Seam Scraper

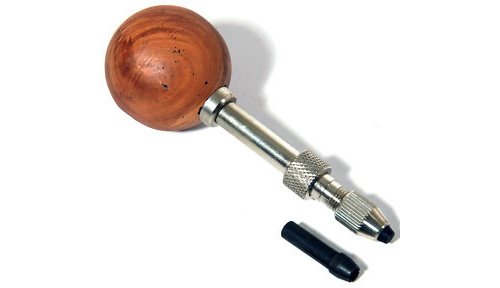
The next thing you’re going eventually need is a pin vise/drill. I wrote a post on that subject that goes into great detail bout how you can put together a complete kit for pinning models together for less than the cost of the stupidly priced Citadel Drill so I won’t repeat all of that here. For our purposes, this is the pin vise I use and it’s $8 from Amazon. It doesn’t come with drill bits but see my other post for some recommendations. Surprisingly, this is one of the few things for the hobbyist that Harbor Freight does not offer.

Amazon Pin Vise Drill

This is the pin vise I use, it costs $8 at Amazon

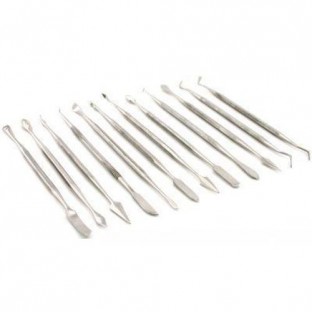
Our final comparison item is the Sculpting Tool Set. This is really optional and you probably wont need this as a person just starting out in the hobby. I do like to use the spreader for basing materials sometimes so it does have uses other than sculpting. Harbor Freight has one listed for $6 and it includes 6 different tools. It’s the 6 Piece Stainless Steel Carving Set and it has a nice variety of shapes and sizes. It’s really a much better value than the Games Workshop Sculpting Tool Set which has two tools and will set you back a ridiculous $25. You can also find this 12 piece sculpting set on Amazon for around $9 – check the various options here, some are free ship and some are free for Prime members but they’re all right around $9.

SE 12 Piece Sculpting Tool Set

SE 12 Piece Sculpting Tool Set

And The Winner Is…YOU!

So we’re at the part where we sum up how much our tool set costs us and compare it to what Games Workshop has on offer. Since I offered up some different options I’ve sort of averaged the cost here a bit, rounding up to give a little room for price fluctuations (keep in mind that prices on Amazon change daily, sometimes even more frequently). Lets take a look:

Knife Set – $16
Sprue Cutters – $5
File Set – $5
Mouldline/Seam Scraper $0 or around $10 (Completely optional and you can get by without one of these)
Pin Vise – $8 (You’ll need to add some drill bits but see my other article first)
Sculpting Tool Set $8

Total = Around $40 – lets say $50 if you throw in a micro drill bit set instead of building the complete pinning kit.

I just saved $100 on hobby tools in 15 minutes!

I just saved $100 on hobby tools in 15 minutes!

That means you’ve just saved a whopping $100 for your tool set compared to what Games Workshop has on offer. Sure, you didn’t get that nifty cloth roll up to carry your tools around in but I’m betting you have something around the house that will work or you can hit your local sporting goods store and find something there for about five bucks. You might even consider checking out etsy to see if someone there can make you the custom roll-up tool pouch of your dreams.

Saving that $100 means you have more money for actual miniatures and models, or you could expand your tool set with some other useful tools. In my next post I’ll show you some other items that I think are good to have in your hobby tool box. As always, feel free to ask questions and/or leave constructive feedback below in the comments section.