Etsy Review: Typhoon Paint Mixer for Hobby & Airbrush Paints

 Geek Gifts, Hobby Tradecraft, News and Info, Tabletop Gaming  Comments Off on Etsy Review: Typhoon Paint Mixer for Hobby & Airbrush Paints
Nov 182015
 

Continuing the idea of sharing stuff that I’ve found to be useful or unique for gamers and hobbyists, today we’re going to look at something really different, the Typhoon Paint Mixer. The Typhoon Paint Mixer is available on Etsy from the seller Kennedys Art Supply.

etsy, typhoon paint mixer, hobby paint mixer, airbrush paint, miniature painting,

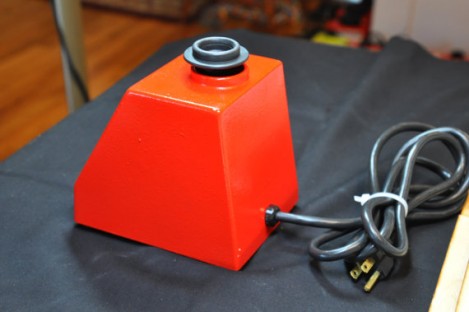
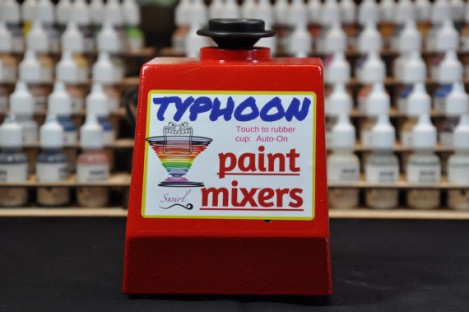
The Typhoon Paint Mixer – perfect for mixing all of your hobby and airbrush paints

Just What Is The Typhoon Paint Mixer?

Simply put it’s an electric motorized paint stirrer that’s made for small sized paint pots used by miniature hobbyists, model builders and airbrush users. If you’re like most folks in those hobbies, what started out as a few paints has likely grown to a fairly large collection in it’s own right at this point and you know that when paint sits around for awhile it separates and settles and can be a pain to shake back into usable condition. Shaking your paints vigorously can also leave them kind of foamy or even result in accidents where the lid comes off mid shake and you have a mess to clean up.

Enter the Typhoon Paint Mixer, a desktop mixing machine that doesn’t actually shake the paint bottles but mixes them via high speed vibration, similar to how test tube vortex mixer works.

Why Is the Typhoon Paint Mixer Better?

A powered hobby paint mixer is going to be one of those gadgets that a lot of people will consider a luxury item and not a necessity. There are a lot of ways to skin the proverbial paint mixing cat. I’ve seen everything from battery operated cocktail stirrers, to using a drill to spin paints, to purpose built hobby paint shakers. The truth is that while any of these methods will work, none of them are ideal, some of them are potentially messy and some can be downright rage inducing. The Typhoon Paint Mixer does one thing, but it does that one thing very well.

Unlike other paint mixers or home brew contraptions there’s no strapping the paint pot into a device or opening it up involved. The Typhoon paint mixer is touch activated. You simply press the pot down on the rubber ring on top of the unit for a few seconds and it does its thing, which is to vibrate very fast in a manner that creates a vortex inside the paint pot and mixes your paint perfectly every time. But don’t just take my word for it, watch the video below.


(As I understand it, there is no longer a “model 1/model 2”. Due to popular request, all of the Typhoon Paint Mixers now come with the larger ring to accommodate the fatter paint pots. You may want to confirm this when ordering though in case I’m wrong)

You can see the paint swirl and change color as it is blended with the medium. The Typhoon does this by swirling the liquid much faster than you could ever shake it by hand or with a battery operated device. The specs state that the liquid is swirled 60 times a second. The interesting thing about this is that you don’t end up with foamy paint even after that vigorous swirling.

One of the best things about this unit is that it doesn’t feel like some cheap plastic toy. I’ve had a couple of the Robart Hobby Paint Shakers and they’re pretty sub par to be honest. They feel cheap and use a proprietary rubber band setup. I’ve burned the motors out on two of these and had them vibrate right off my desk on more than one occasion. The Typhoon Paint Mixer doesn’t require any special hardware and it is HEAVY! I haven’t weighed it but the case and bottom are thick steel and it probably weighs between five to ten pounds which means it doesn’t budge when your operate it. It’s also a plug in unit so there are no batteries to replace.

The description on Etsy states that these units are handcrafted, but what I think that actually means is that they are surplus industrial equipment that has been reconditioned and/or rebuilt and made presentable with a new paint job and labeling. Robert Kennedy, the maker of these units is very committed to making sure that buyers of the Typhoon Paint Mixer are 100 percent satisfied and he offers a 90 days money back or replacement guarantee. He also offers various colors and I think will do custom colors upon request. (I also think it’s kind of cool that this Etsy seller has found a legitimate second life for these mixers. Bonus points for keeping them out of the landfill.)

etsy, typhoon paint mixer, hobby paint mixer, airbrush paint, miniature painting,

The Typhoon Paint Mixer is solidly built and has a heavy duty electrical cord

What Brands of Paint Can I Mix With The Typhoon Paint Mixer?

Robert states that you can mix just about any bottle of hobby and model paint with the Typhoon Paint Mixer. I’ve tested the unit with lots of different paints including Vallejo, Reaper, Games Workshop, Tamiya, Mig/AK, Minitaire and more. It works great with all of these paint pots as they all fit into the rubber ring on top of the paint mixer. In every case it’s worked exactly as advertised and thoroughly mixed the paint. (If you need help selling the idea of purchasing one of these to your significant other, you might want to mention to him or her that it’s also great for shaking up bottles of nail polish, everybody wins!)

The Typhoon Paint Mixer, Is it Worth It?

Now we’re going to talk about what this thing will cost you. As I mentioned above, this is definitely a “luxury gadget”. It sells on Etsy for $75 shipped and currently only ships to US addresses. If I had to guess I’d say that there’s no international shipping option because the unit is so heavy that shipping it overseas is likely to be an expensive prospect.

$75 for a paint mixer sounds like a lot on the surface of it but considering what I spend on paint, brushes, airbrush equipment, etc. it’s just another piece of equipment. That kind of purchase isn’t in everyone’s hobby budget though, so your mileage may vary. For the sake of comparison though, if you were to buy an actual vortex mixer for your paint station you’re looking at about $250 for a new unit on Amazon and other sites. There’s no way I would ever recommend spending $250 on a paint mixer. If we compare paint mixers to paint mixers, I killed two Robart mixers after about of year of use for each one. Considering that those run about $40 apiece, plus batteries, I spent more on those two mixers than I spent on the Typhoon.

Having used the Typhoon Paint Mixer though and seeing in person how well it works, I can recommend this at the current listed price on Etsy for it’s utility, it’s quality and durability. I’m definitely giving the Typhoon Paint Mixer a thumbs up if you’re a serious painter and can fit it into your hobby budget. As a holiday gift, I don’t think I know any hobbyist who wouldn’t appreciate getting one of these.

Get your own Typhoon Paint Mixer at Kennedys Art Supply on Etsy!


Feb 172015
 

In the last couple of articles we’ve looked at airbrushes and airbrush compressors. Today we’ll continue with that theme by exploring all of the extra stuff that you may need as you begin to airbrush. In terms of price per item the airbrush and compressor are likely the two most expensive parts of the process. However there are quite a few other things that you’re going to want to pick up as well. Most of these are fairly inexpensive. Some of these items are optional and you can either pass on them completely or pick them up at a later date. There are a few things though that are pretty much mandatory due to safety or environmental concerns. Even though we’re talking about spraying water based acrylics through your airbrush you’ll still want to take care of yourself and your surroundings.

In this article we’ll tall about all of the odds and ends that I use when airbrushing, why I use them or find them useful and finally, whether I feel they are must haves or optional buys.

I’ve got an Airbrush & Compressor so I’m Ready to Start, Right?

If you’ve picked up an airbrush and compressor or other air source you’re probably thinking you’re all set. Well, not quite. There are a few other items you’re going to want to pick up or at least consider. Fortunately, if you’ve spent carefully on the two big items you’ve probably got some room left in the budget to pick some of these things up.

Airbrushing Is Still Spraying Paint, That Means Safety First

First off lets talk about your airspace. What I mean by that is the air that you’re breathing. When you spray paint you’re going to breathe in atomized paint particles unless you take some precautions to minimize your exposure. I know, you’re probably thinking “wait, hobby acrylics are water based paint, how bad can that be?” What you need to be aware of is that some of the materials in paint, like cadmium used in yellow paints is bad for you if you ingest it. I’m not a doctor so I don’t know what the threshold is for breathing something in like cadmium but why risk it? Cadmium and other ingredients in paint can cause organ failure if you get enough exposure. If you’re already sensitive to things or have other issues (or an issue you might be unaware of) you really should take some steps to mitigate your exposure. If you don’t believe me about how much paint you can ingest in an airbrushing session. Blow your nose after you’ve painted something green or black without a mask and see what that looks like. You’ll probably be surprised by how much paint you can actually suck up when you airbrush.

There are two main ways to deal with this. If you’re painting in the garage then you can probably get by with just a mask. If you’re painting in the house, you’ll want to use a mask and some sort of spray booth. You can make a spray booth, check out Google or YouTube and you’ll find some articles or videos there on kludging together a spray booth as a DIY project. If you prefer a ready made solution you can get a portable spray booth, probably from the same place you bought your airbrush and compressor.
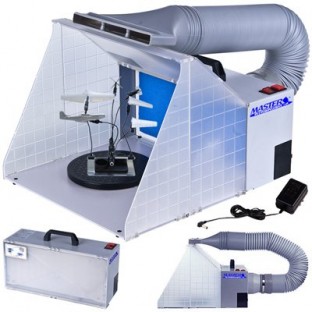
airbrush spay booth

This portable airbrush spray booth will keep your airbrushing environment clean

I use the Master Airbrush Portable Spray Booth. These things used to be ridiculously expensive but have come way down in price over the last few years. Retail is $169 but you can pick this up online for around $80. This is offered in a couple of different packages. You’ll want the one that includes the extra hardware for the exhaust. This comes with a semi-rigid flex hose and a spout that is narrow so that you can wedge it in a slightly open window allowing you to vent the air outside. The plastic outlet actually has a raised ridge around it so that you can close the window on it and it stays in place requiring only a narrowly open gap. (It’s pretty mild weather where I live so having a little gap in the window is no big deal. If you’re in colder or warmer climes you’ll probably want to seal that gap.)
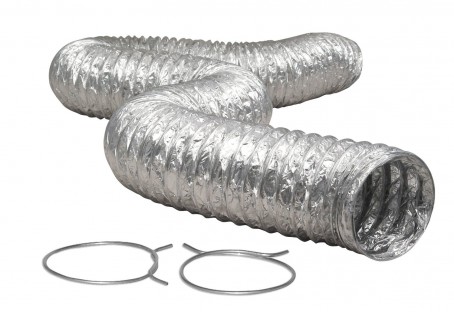
airbrush spray booth dryer vent hose

This type of dryer vent hose is much more flexible than what’s included with the spray booth

One caveat: the flex hose was a little too rigid for me because of where I needed to position the spray booth relative to the window. I solved this by not using the included flex hose and picking up a 4” diameter dryer vent flex hose at Home Depot. The dryer hose was much more flexible, allowing me to route the exhaust where I needed it easily. One other note, this spray booth is rated for non-flammable materials. Don’t use it with lacquer or enamel paints because the fan isn’t spark proof . You’ll need to explore other more expensive options if you plan to spray anything combustible. I would rate the portable spray booth as a “must have” if you’re working inside your house. Optional if you’re in the garage.
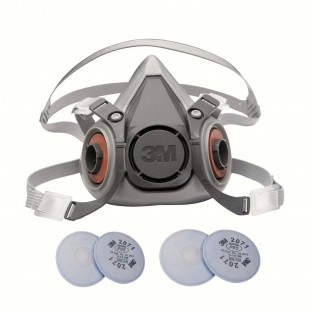
The 3M 6000 Respirator Half Mask is a good choice when using an airbrush

The 3M 6000 Respirator Half Mask is a good choice when using an airbrush

The other safety item is a mask/respirator. Get a good one because it’s your health we’re talking about. In a pinch you can use a disposable paper one and that’s better than nothing but you’re much better off investing in a good mask. I’m recommending the 3M 6000 series half mask. This is a half mask so it only covers your nose & mouth and won’t get in the way of your glasses. It includes filters that are good for sanding/grinding/acrylic painting and you can upgrade it to use filter cartridges if you’re working with harsher chemicals like lacquer or enamel paints. I’m rating the mask as a must have accessory because health is important and I want you to be around awhile to enjoy your hobbying!
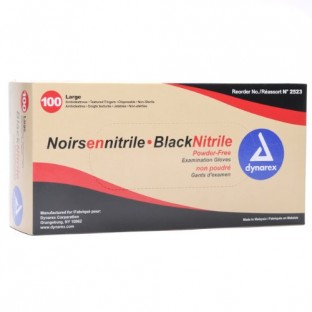
disposable nitrile or latex gloves

Disposable gloves will help keep airbrush overspray off of your hands when holding small models or parts

The next thing on our list is optional, depending on how much you care about getting paint on your hands. I find it handy to keep a box of latex (or nitrile if you’re allergic to latex) disposable gloves in my paint area. I don’t use these for brush painting but I definitely do use them when I’m airbrushing, at least on the hand I’m holding miniatures or models with. Semi-optional but recommended.

Last but not least for environment accessories is something that a lot of people overlook and that’s good lighting. You probably have good lighting on your paint desk where you brush paint. You should have good lighting where you airbrush as well. Either get another light or if you have a light with one of those table clamps that it sockets into, just pick up an extra table clamp and you can move your light around without having to get under your desk to undo the clamp all the time. Good lighting in your work space is a must have!

I have posted other articles about proper desk lamps and daylight bulbs for hobbying and you can check those out if you’d like a little more information on those subjects.

Airbrush Care and Maintenance Accessories
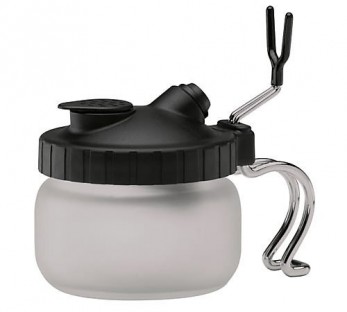
iwata airbrush cleaning station

The Iwata Airbrush Cleaning Station is a must have and includes a built in airbrush stand

In this section we’ll look at items that you’ll want to have to take care of your airbrush and work area. There are several items that I find really helpful to have on hand. One of my favorites is an airbrush cleaning station. This is a basically a jar that your airbrush nozzle sockets into and it allows you to empty out paint, cleaning fluid and water rapidly when you’re doing a color change during an airbrushing session. The jar has a little filter that allows air out but keeps moisture and particulates in. When the jar is full you just remove the lid and dump it. You can probably find a video on YouTube telling you how to build one of these if you want to make it a DIY project or you can buy one. I have the Iwata Airbrush Cleaning Station and I like it because it actually has a built in airbrush holder as part of the handle. You can pick this item up for around $20 online usually. Optional but so handy I really recommend it.
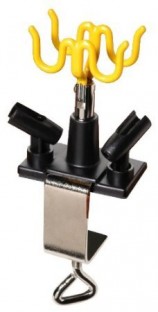
airbrush holder

This airbrush stand will hold four airbrushes and clamps on to your desk

Airbrush stands come in single double and quad configurations. Handy to have but not required. Definitely consider getting one if you airbrush a lot and have more than one airbrush.
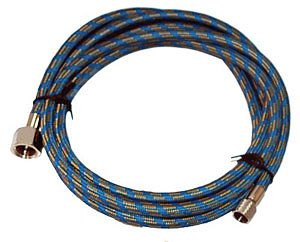
10 foot braided airbrush hose

This 10 foot long braided airbrush hose will give you plenty of room to work and should last just about forever

One thing I really recommend is a 10′ long braided airbrush hose. Don’t use the thin vinyl ones that come with some airbrush packages. The hose will kink and/or crack eventually. I’m also not a fan of the plastic coil up hoses. They always seem to be in the way and I feel like I’m fighting against my hose all the time. If you purchased one of the Master Airbrush Compressors I mentioned in my previous article it probably came with a 6 foot braided hose and that may be adequate for you so try it out first. Since I keep my compressor on the floor I like having the longer hose. Recommended but optional.
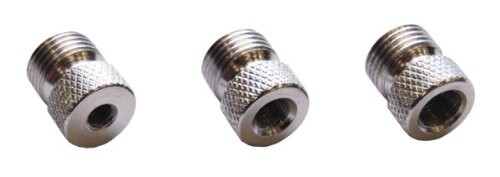
airbrush adapter set

This handy airbrush adapter set covers all of the most common airbrushes

If you’re using a braided hose chances are it’s a standard Iwata hose unless it states otherwise. One thing that’s frustrating about airbrushes is that every manufacturer seems to use a different sized threaded fitting for their air connections. You’ll need to make sure you have the correct adapter to mate your airbrush to your air hose or quick disconnect. If you’re not sure, here’s a handy three pack of the most popular adapters. Recommended depending on your airbrush and hoses.
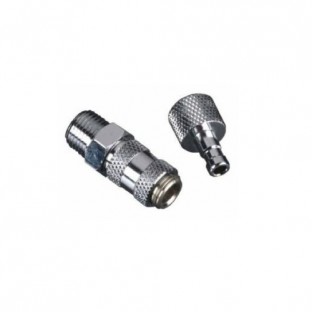
iwata airbrush quick  disconnect

Airbrush quick disconnects are a very handy accessory but avoid the cheap/generic ones as they tend to leak

An item that I really like is airbrush quick disconnects. These don’t typically come with your airbrush but are a really excellent add-on. They allow you to swap out airbrushes almost instantly by use of a snap together chuck as opposed to having to unscrew everything. I have one of these attached to each end of my airbrush hose and a quick disconnect fitting at the compressor and on each airbrush I use. If you decide to go this route, I really recommend you spend a little extra and get the Iwata branded ones. I originally went with generic ones sold by TCP Global and I had rotten luck with those. After trying several of them I switched to Iwata because every one of the cheap ones leaked air like a sieve. Strictly optional but very handy. If you go with quick disconnects spend a little extra and get good ones.
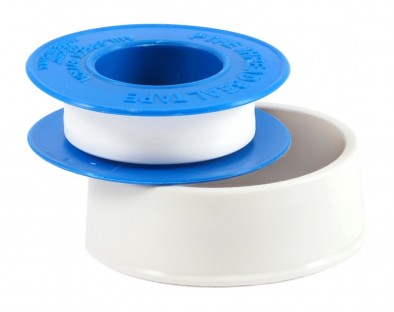
Teflon pipe thread tape

Teflon pipe thread tape – pick a roll of this up at the local hardware store

You may have received a roll of Teflon tape with your air compressor. If you didn’t, pick one up at a hardware store for about two bucks. Use this on anything that’s threaded, like where your regulator connects to your compressor or your quick disconnect connects to your regulator, etc. Basically any place there’s an adapter or fitting needs a bit of of this to ensure it doesn’t leak. Recommended
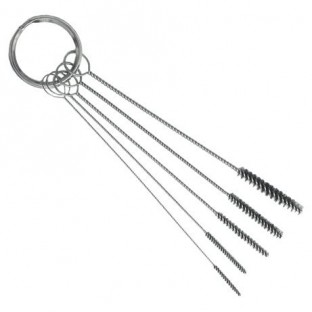
airbrush cleaning brushes

These tiny brushes will be useful when you break down your airbrush for a thorough cleaning

Pick up a set of airbrush cleaning brushes. This will make the process of giving your airbrush a thorough cleaning much easier. You’ll be using these when you do a total breakdown of your airbrush to clean it at the end of your painting sessions. Recommended. Look for a detailed how-to about airbrush breakdown and cleaning in a future article.
airbrush paper towels

You probably have these around the house, keep a roll handy at your airbrushing work area

Paper towels. Yep, it probably sounds dumb to tell you this but you’re going to want to have a roll handy because you will spill stuff at the worst possible time and need them “right now”. If you’re not spilling stuff, you’re not really airbrushing.

airbrush needle badger sotar 2020F

Keep an extra airbrush needle around, so you’ll have it in an emergency

No matter how careful you are, eventually you’re going to bend or damage your airbrush needle. Buy an extra airbrush needle now because you’re going to do this right in the middle of a big project when you can’t afford to wait a few days to get one in via the mail. Murphy’s law also assures you that your local hobby shop will be out of the exact airbrush needle you desperately need in an emergency. All kidding aside, get a spare. Highly recommended.
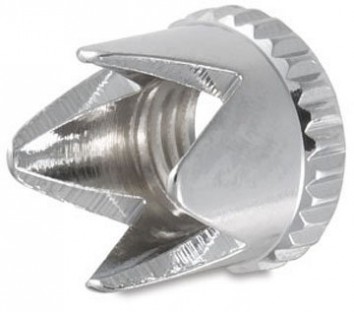
airbrush crown cap iwata

An example of an airbrush crown cap – get the one for your airbrush if it didn’t come with one

If your airbrush didn’t come with one, pick up a crown cap. Your airbrush nozzle probably comes with a nozzle cap that looks like a nose cone on a rocket with the tip shaved off. When you get in really close to do fine detail that cap restricts airflow and actually creates a bit of turbulence at the tip that can make your fine lines fuzzier than you want them to be. A crown cap has cutaway areas at the nozzle to reduce most of this turbulence but still has protrusions to protect the needle. Some experienced airbrush users will paint without the nozzle cap but I don’t recommend that, it’s a good way to damage the tip of your airbrush needle. Recommended
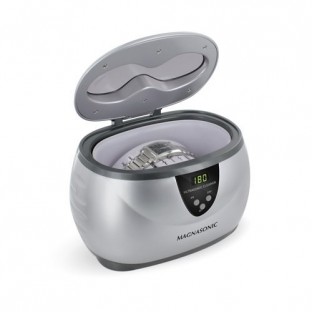
ultrasonic cleaner for airbrush

This small ultrasonic cleaner is great at removing bits of stuck on dried paint from your airbrush

An ultrasonic cleaner is strictly optional but handy to have around when you do a thorough breakdown and cleaning of your airbrush. These used to be outrageously expensive but you can now find them everywhere online in the $40 to $60 range. You fill them with water and dunk your airbrush parts for a few minutes and they’ll basically vibrate all the stuck on bits of paint and junk off of your airbrush. Usually one 5 to 10 minute bath cycle does the trick. More if you’ve been a slacker and not cleaned your airbrush or let paint dry in it. Also, you can get this past your non hobbying significant other by telling them they can use it to clean jewelry too. Optional
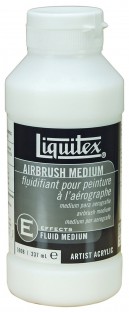
liquitex airbrush thinner

Liquitex airbrush thinner works well with a variety of acrylic paints

If you’re using an airbrush paint or a hobby paint, pick up the same brand airbrush thinner if available. Golden or Liquitex Airbrush Medium is also a good choice. Otherwise you’re going to have to do some experimenting to find a suitable thinner. Almost all paint will need to be thinned to be shot through an airbrush. Even some of the paints marketed as airbrush ready may need a little more thinning to really flow well. In a pinch you can use water or alcohol but I’d experiment with that a bit first. I’ll put up another article in the near future about thinning paints for use in an airbrush.

distilled water airbrush

Plain old distilled water. Available at the grocery store for about $2 a gallon

Get a gallon of distilled water at the grocery store. Always run a little of this through your airbrush after changing colors or running airbrush cleaner through it. Two bucks at the grocery store. Highly recommended
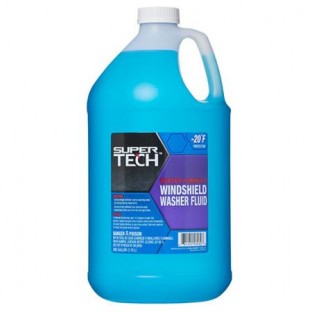
windshield washer fluid airbrush cleaner

Windshield washer fluid, available at your local Wal Mart or auto parts. Get the cheap stuff and use it as airbrush cleaner.

You can buy expensive airbrush cleaners to run through your airbrush between paints and after painting sessions. Do this instead: Pick up a gallon of cheapo windshield washer fluid at your local Wal Mart or auto parts. Get the cheap blue stuff that’s around two bucks a gallon. Don’t get the expensive stuff. This is mostly colored water with a bit of methanol and possibly some detergent mixed in. It does a great job of cleaning your airbrush and is dirt cheap. A gallon will last you a long time. Never leave this or any other cleaner in your airbrush, always run clean water though your airbrush after running any sort of cleaner through it.
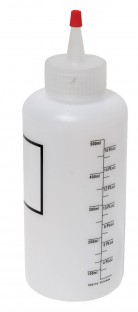
squeeze bottle airbrush

Plastic squeeze bottles are great for keeping your distilled water, cleaner and other fluids handy

You’re going to want a few plastic squeeze bottles to make your life easier. I recommended one for distilled water and another for windshield washer/cleaning fluid as you won’t want to be handling one gallon bottles of that stuff while you’re airbrushing. Pick up a couple of these liter or half liter sized squeeze bottles with caps and keep those filled up with your cleaning fluids at your work area. Don’t forget to get a small funnel to make transferring from the big bottles to the small bottles a snap. Very handy and of course optional but recommended.
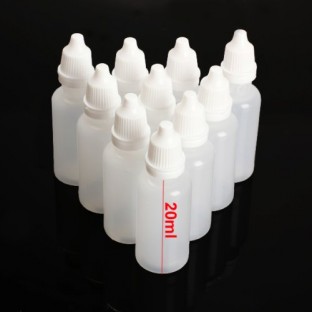
airbrush paint dropper bottles

These small plastic dropper bottles are great for custom paint mixes or transferring paint from pots

If you’re mixing your own colors or transferring paint from a large container to a smaller more convenient container get some of these dropper bottles. These are super cheap, around $15 for 50 of them shipped via Amazon and they are really handy to have around.
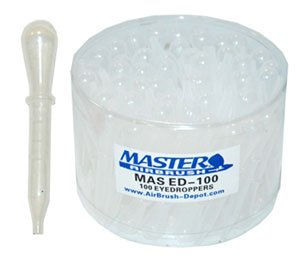
plastic airbrush pipettes

Plastic pipettes work great for transferring paint between paint pots and your airbrush

Also consider picking up some of these plastic pipettes if you’re using paint that isn’t packaged in dropper bottles. Trying to pour paint from a paint pot into an airbrush color cup is a sure way to make a mess and waste a lot of paint. Highly recommended if you’re using paint from non dropper bottles.

There’s a few other items that are handy to have around but you probably have these around the house or your hobby work area already. Keep an old brush around if you’re mixing colors and thinner in the airbrush paint cup. Also keep a pen and pad handy so you can make notes about custom color mixes and thinning paints as different paint colors in the same line of paints will have different thinning requirements.

Airbrush, Compressor and Accessories, Now It’s a Party!

At this point, you should be pretty set to start airbrushing, all that remains is for you to dive in and just do it. In upcoming articles I’ll revisit this subject to talk about thinning paints for use in an airbrush and how to clean and maintain your airbrush. I’ve added links below to the previous two articles in this series and in the future I’ll come back here and add links to any new articles that are related to this content to make it easier to find everything. If you have questions, feel free to contact me here or to find me over on Twitter @HolyCrapItsLate.

Part 1 – Airbrushing for the Miniatures Hobby – Airbrush Basics & Mini Reviews

Part 2 – Airbrushing for the Miniatures Hobby – Airbrush Compressors & Hardware

As always, your constructive comments and suggestions are welcome. Feel free to leave them in the comment section below.

Feb 062015
 
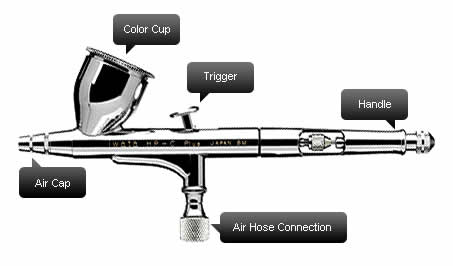
Here's an airbrush with the main parts labeled so that you can get familiar with the terminology

Here’s an airbrush with the main parts labeled so that you can get familiar with the terminology

I’ve been thinking about airbrushes a lot lately and there’s been increasing discussion on some of the various hobby groups and boards I participate with or lurk on. The discussion usually starts with someone asking what specifically they should buy or do when they’re starting out with airbrushing. This is a pretty interesting subject and I’ve got a fair amount of experience with it so I thought I’d share a bit of what I know with you all. After I started writing about airbrushes I realized that there is so much to talk about that it would probably be better if I broke this up into a series of articles rather than one ginormous TLDR post. What I’ve decided to do is to turn this into at least a three part series where I’ll cover airbrush basics and my recommendations on specific airbrushes based on my experiences in part one. Part two will cover compressors, hoses and other related hardware and finally, part three will cover necessary and optional accessories – things that I find handy to have around when airbrushing.

Before we really get rolling here I want to mention a couple of important things. First, through this entire discussion I’m going to talking about airbrushes and painting using Acrylic water based hobby paints. These are the same type of paints you’ll typically use for brush painting miniatures and hobby models, brands like Vallejo, Reaper, Games Workshop, etc. I don’t use enamels or lacquers at all so the information presented here may not be suitable for people using those types of paints. Second, if you’re thinking that getting an airbrush will magically make you a master painter as soon as you hook everything up and start spraying paint, well, stop thinking that. Airbrushing will allow you to do a lot of neat stuff and get really nice finishes but it comes with its own set of problems and learning curve. Like any other skill, you’ll need to put the time and effort in to master your craft and fully take advantage of what an airbrush can offer you. Lastly, all airbrush paints are different and most will need to be appropriately thinned in order to spray them with an airbrush. Even the ones that are pre-thinned or labeled “air” paints will sometimes need extra thinning or benefit from some tinkering. I’ll cover this at a later date in a separate article.

The Basics – Airbrush Feed Types

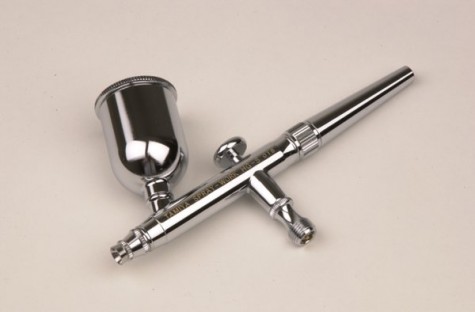
There are three types of feeds for airbrushes. The feed type describes how your airbrush moves paint from the reservoir through the brush body and out the nozzle as you paint. These types of airbrush feeds are Siphon Feed, Side Feed, and Gravity Feed.

Siphon Feed Airbrush

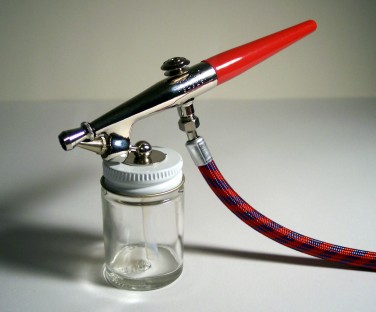
A typical Siphon Feed airbrush

Siphon feed means that the reservoir is connected to the airbrush via a spigot under the body. The reservoir is typically a jar with a screw on lid that has an integral hose/pickup tube that sucks paint up into the airbrush when you press the trigger. This style of airbrush is good for moving large volumes of paint which makes it good for terrain or base coating larger models but will generally not be precise enough for detailed work. To be honest this isn’t much better than using a rattle can so I don’t really recommend this style of airbrush for miniatures. (Rattle can = commercially available aerosol spray paint cans with a ball agitator inside that rattles around when you shake it up)

side feed airbrush

A Side Feed airbrush, this one only allows you to mount the color cup on one side

Side feed airbrushes have the spigot or attachment point for the reservoir straight off the side of the airbrush body so that the paint reservoir sits parallel to the body. These typically have a paint cup and some can be attached to either side of the airbrush which is helpful for left/right hand users. This airbrush style is used a lot by illustrators but in my experience isn’t that great for people doing models or miniatures as the cup seems to always make using this style of airbrush awkward because of the widely varying surfaces and angles you encounter when painting small models.

gravity feed airbrush

Gravity Feed airbrush with a fairly large reservoir/color cup

Gravity feed airbrushes have the paint reservoir attached to the top of the airbrush right on the barrel. Paint goes in the cup and when you press the airbrush trigger paint flows into the air stream and out the nozzle. Gravity feed airbrushes, in my opinion, are the best choice for painting models and miniatures because they require lower air pressure to operate and allow you more control over the amount of paint coming out of the nozzle. (You can really thin down paints or use inks and dial down the air pressure to get very fine lines when using this type of airbrush).

Gravity feed airbrushes will sometimes be manufactured and sold with different cup sizes or interchangeable cups so make sure you know what you’re getting before you purchase. I tend to favor the medium size cups although a large cup is handy if you’re base coating something large or assembly- lining a bunch of miniatures.

Airbrush Action Types

Airbrush action refers to what happens when you press the trigger on the airbrush. There are two kinds of airbrush action, single action and double action. Single action airbrushes are the spray guns of the airbrush world. This means that when you press the trigger it operates the same way a rattle can works – paint and air flow out of the nozzle all together. You don’t get to decide how much paint comes out when you press the trigger, it’s all or nothing. For this reason you should avoid a single action airbrush.

A double action airbrush has a two stage trigger system. The trigger moves up and down as well as traveling front to back. This means when you depress the trigger you get airflow without paint and as you slide the trigger back towards you, the paint starts to mix with the air and flow through the nozzle. The further back you slide the trigger, the more paint flows through the nozzle. This allows you a great deal of control over the paint and air mixture enabling you to go from a large flow of paint for broad coverage to fine lines when you need to hit some small details. This does take some getting used to and you’ll need to practice controlling your paint this way but eventually it becomes fairly intuitive. I absolutely recommend you get a double action airbrush.

Airbrush Needle and Nozzle Sizes

Airbrushes come in a variety of needle sizes and you usually find that they have a matching nozzle that either comes packaged together with the needle or will need to be purchased along with it. Needle sizes are usually defined in millimeters, like .21mm, .35mm, .5mm etc. The larger the number, the larger the coverage with that needle and nozzle set.

The largest needles that you’ll be interested in are the ones around 5mm but you really only want to consider this for areas where you need to put down a lot of paint as you won’t be able to do fine detail work with this size range of needle.

Going down a bit from the largest are the .3mm – .35mm “mid range” size of airbrush needles. These are pretty good all around sizes and will allow you to base coat and do some detail work, stripes, checks, camo patterns, etc.

Lastly for our purposes is the range of needles that fall around .20mm to .25mm. This size range is going to give you some really fine lines and allow you to do some nice freehand work. You can also do some base coating with this size but you’ll need to have everything cranked up so you can get the coverage you want. This size range is what I typically recommend because while it may feel a bit overwhelming when you first start out, if you do even a moderate amount of airbrushing you’re going to grow into this fairly quickly. You’ll be able to take advantage of the fine control you already have rather than buying a less capable “starter” airbrush and then needing to replace it a few weeks or months later.

So What Kind of Airbrush Should I Buy?

To sum up you’re going to be looking for an airbrush that is Gravity Feed, Double Action, and .20mm to .30mm needle and nozzle size. Next we’ll take a look at some different airbrushes and I’ll share my thoughts with you based on my experiences with some that I own or have used.

Airbrush Reviews and Recommendations

I’ve been using airbrushes for close to 30 years but not continuously during that time so it’s been sort of a weird learning curve. I started like a lot of people probably did all that time ago – with a cheap plastic hobby shop single action siphon feed brush that was basically akin to a rattle can that you could change colors with. This came with a thin plastic hose and an adapter that allowed you to attach it to a canned air source. This is probably the worst way you can start and I bet that a fair number of hobbyists never get any farther than this because it’s a big dumb ungainly set  that doesn’t give you any of the control or benefits of a quality airbrush set up. I’m pretty sure you can still find these Testors brand airbrush kits at places like Michael’s or other craft and hobby stores. Avoid these, you’re going to waste a lot of time fiddling with this and no matter what, you’ll never get fine detail work out of one. On top of that, canned air is ridiculously expensive and wasteful. At $12 to $14 per can of air, it’s likely that by the time you learn to get any decent results with this setup you will have spent enough money on canned air to have purchased an actual airbrush compressor.

Having owned and/or used several different airbrushes I feel very comfortable recommending the following three. These are quality products backed by reputable companies. The airbrushes, accessories and parts are all readily available at good hobby shops and online. Here are my top three recommendations:

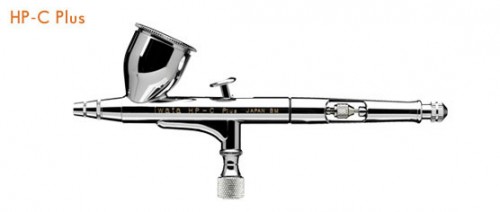
Iwata HP C Plus Airbrush Mini Review

Iwata HP-C Plus Airbrush

The Iwata HP-C Plus Airbrush is a solid, high quality dependable workhorse that will take you a long way

When I finally decided to get serious about airbrushing – about 10 years ago – I made the jump from a Badger series 150 to the Iwata HP-C Plus airbrush. It was a huge step up in quality and control. This airbrush is a high performance, high precision workhorse and has served me well. It is dual action, gravity feed and has a nice 1/3 ounce color cup. These can be purchased with either a .3mm or .2mm needle and nozzle and you can swap them out if you decide to start with the larger size and work your way down as you become more skilled. Retail for one of these airbrushes is around $136 but I have seen it on Amazon regularly at around $100 which is a nice savings. This also comes with a machined metal cap for the paint cup which is nice when you’re holding the airbrush at odd angles for some of those more fiddly models.

I want to note that I have an older model of this airbrush that is no longer available and it has a solid handle back piece as opposed to the current models which have a really nice cutaway designed to help you control your paint flow. About a year ago I noticed that the trigger action had worn down on this and it wasn’t as smooth as it had been so I gradually moved away from this airbrush and tried some others out.
Badger Sotar 2020F-2 Mini Review

Badger Sotar 2020-F2 Airbrush

The Badger Sotar 2020 -F2 Airbrush is a high precision, user friendly, budget friendly (when purchased on sale) tool. I highly recommend this one

The Badger Sotar 2020F-2 is my current go-to airbrush. This is also a dual action gravity feed model. The designation F stands for Fine and they’re not kidding, this needle is .19mm and will allow you to get some really precise freehand work in. It also has a very fine adjustment dial at the back end so that with properly thinned acrylics or inks and good air control you can make some “hair” thin lines if needed (but believe me, this takes some practice!). The -2 designation is the paint reservoir size and you’ll want to make sure you’re getting that model as it has decent sized 1/12 ounce paint cup. The -1 model is designed for illustrators and the reservoir is actually built in to the airbrush body to facilitate one drop at a time ink usage, you’ll want to avoid this as it won’t hold enough paint for most of the tasks you’re going to be doing.

The Sotar 2020F comes apart easily for cleaning and maintenance and parts are readily available online and direct from Badger – who coincidentally have great customer service. This airbrush kit includes an extra Fine sized needle and a wrench for maintenance. Retail on this airbrush is an astounding $422 but I have to tell you I have NEVER seen it for sale anywhere at this price. They seem to mostly show up in the $200 range if you see it in a shop. However the Badger Sotar 2020F is on sale pretty frequently on Amazon for right around $100 which makes it an incredible value for the level of precision and control it gives you. I highly recommend this one but don’t over pay, wait for a sale!

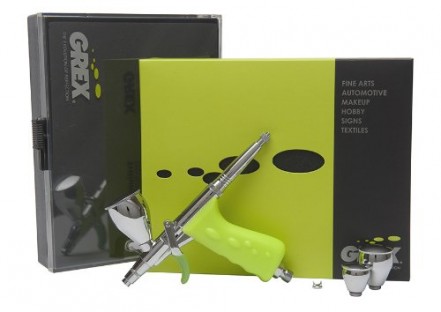
Grex Tritium TG3/TG2 Pistol Style Airbrush Mini Review

Grex Tritium TG3 Airbrush

The Grex Tritium TG2/TG3 Pistol Grip style airbrush. Another great choice with lots of well executed design features

I’ve saved the Grex Tritium TG2 for last because even though it is another dual action, gravity feed airbrush it is a beast of a different nature. Unlike the other airbrushes I’ve talked about that have a top mounted trigger that you push down and slide back, this one has a pistol grip and trigger style control assembly. This means that when you engage the trigger you’ll feel that it moves back about half of its travel and then sort of stops/hesitates. The first half of the trigger pull is when the air starts to flow and as you pull the trigger back farther paint starts to flow out (this sounds weirder when I describe it than it actually feels when you use it). This is an entirely different feeling action than what you’re used to if you previously used a regular airbrush but it’s actually a pretty natural feel and becomes very comfortable after you use it for a bit.

The Grex Tritium series has some very well thought out design features that I really like. First the nozzle and needle sets come packed together and are easily changed out. TG2 is the designation for the .2.mm needle and nozzle kit and TG3 is the .3mm needle and nozzle kit. This airbrush also has interchangeable color cups in three different sizes and all three cups include a lid. These cups thread on so they won’t work loose while you’re working. Another great design feature is that nozzle guard/crown tip. These are actually magnetic and will also stick to the back end of the airbrush if you need to change them while painting for those times you’re doing detail work and need to get in really close to the surface you’re painting. While it takes some getting used to if you’re switching from a standard airbrush setup to this pistol grip style it really works well and allows you to do some fine detail work and I think that for me at least the pistol style grip and trigger is less fatiguing during long painting sessions. This kit comes in a plastic carrying case and includes the 3 different sized cups, a regular nozzle cap, a crown cap and a wrench,

The Grex Tritium is pricier than the competition but I think it’s due to the well thought out and improved design features that it has. Keep in mind that it includes extra color cups with lids and a crown cap which other airbrushes do not include in the basic set up. Retail for this airbrush is $299 but it is usually available for right around $200 online. For the extra accessories you get and the nifty design ideas I think it is a good value even though it’s a pricier choice.

The Not So Final Word on Airbrushes for Hobbyists and Modelers

This is intended to be a basic overview of airbrushes and their various features. I’ve also posted some comments about airbrushes I have used and am still using. It is by no means an exhaustive list and I am not a “tool collector” either so you won’t see me buying and opining on every airbrush that’s out there. Let me also say that what works for one person may not work for another. Realistically there is no “be all, end all” airbrush because there’s a learning curve that comes with airbrushing as well as some trial and error for most folks. I am confident telling you not to buy a cheap “starter airbrush” with the intent to try it out for awhile and move up to something expensive. You’ll most likely find yourself frustrated by the limitations of cheap tools and may give up entirely if you have some bad experiences. You’re better off buying a good airbrush and growing in to it as your skills improve.

There’s a lot to learn about airbrushes and in the next few articles I’ll cover a broad range of subjects related to airbrushing.. Next up will be an article about compressors and related hardware and after that I’ll talk about all of the various accessories and airbrush odds and ends that you’ll find handy to have around.

As always, comments and constructive feedback are welcome. Feel free to add something in the comment section below but please keep things civil.

Images: 1 2 3 4 5

Miniature & Modeling Hobby Tools – More Essentials

 Hobby Tradecraft, News and Info, Tabletop Gaming  Comments Off on Miniature & Modeling Hobby Tools – More Essentials
May 092014
 

The last couple of posts here have been about not spending absurd amounts of money on your basic tools for assembling and finishing miniatures and model kits. If you read “How To Save $100 On Hobby Tools” then you’ll recall that I mentioned I’d recommend  some other tools beyond the basics that you’ll probably want to add to your hobbying tool box with some of the money you’ve saved. Today we’ll take a look at a few items that I think are good choices for expanding your hobby tool set.

The following items are things that I use on a regular basis and are the tools I’ve come to rely on after a couple of decades of building miniatures and models. While there are a couple of essentials, you probably don’t need to run out and buy all of this stuff at once. I’ll offer up some suggestions and provide links to where you can purchase those items, usually on Amazon for convenience sake and because lots of items there ship free or free with an Amazon Prime membership.

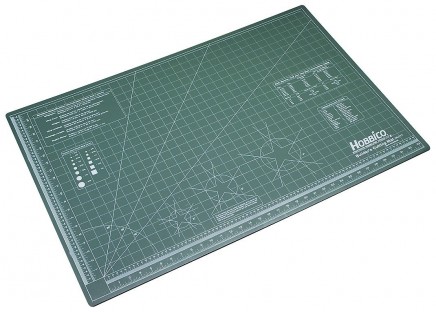
Self Healing Cutting Mat

This particular item is pretty much your first additional must have. It’ll keep your work area from getting damaged by your tools, paint and glue. This is especially important if your work area happens to be your wifes (or moms) dining room table. Get a self healing cutting mat and get the largest one you can reasonably use (and afford) for the space you’re usually working in. Measure! I use an 18” X 24” mat which generally gives me a lot of room. I also have a small one that’s about 6” X “10” or so that I can throw in a bag if I’m putting together a little travel tool kit for a demo or a group build at my local FLGS.

Set yourself up with a cutting mat - particularly if your work area is the dining room table!

Set yourself up with a cutting mat – particularly if your work area is the dining room table!

Let There Be Light

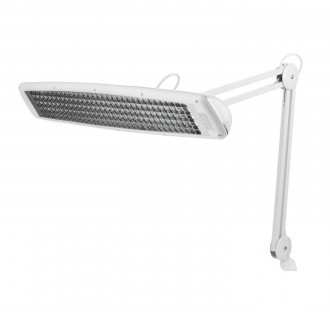
The next item you’re going to want is a good light over your work space. These days Ott Lights seem to be all the rage but I personally don’t care for them other than the fact that they’re compact and somewhat portable. I use a pair of swing arm desk lamps with daylight bulbs that I got from Ikea a few years ago, unfortunately those are no longer available so I can’t recommend the exact ones I  have. If  you have an Ikea nearby, it’s worth braving the crowds there to check out their selection of desk and office lighting as they have a large variety of stuff. (It’s also a great place to find a workbench/desk and shelving or display cases for your hobby/game room.) Another lamp that is very popular with miniature painters is the LSF 150 but these also seem to be somewhat scarce. A friend of mine uses this Daylight Triple Bright Lamp and has been very satisfied with it. It’s available at Amazon but it’s a bit pricey. It does however, ship for free.

The Daylight Triple Bright Swing Arm Lamp

The Daylight Triple Bright Swing Arm Lamp

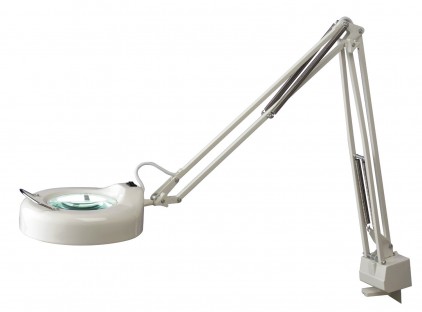
Another alternative is a lamp with a built-in magnifier. These are pretty easy to find and Harbor Freight Tools even carries one. These come in both fluorescent and LED styles. If you buy fluorescent, you’ll want to replace the supplied bulb with a daylight bulb. Unfortunately I can’t speak much on whether or not the LED lamps are a good fit for this kind of work as I don’t own one and haven’t worked with one either. Whatever you decide, I recommend getting a lamp with a long swing arm that clamps to the edge of your desk if possible. This will give you a lot of freedom to position the lamp head where you need it and can save valuable real estate on your workspace, particularly if it’s a small area to begin with.

One last tip, check your local Staples/Office Depot type office supply store, they typically have a good assortment of lamps that you can check out before you order one online. You may also get lucky and find a sale/markdown item that’s just right!

Typical swing arm Fluorescent Lamp with desk clamp - Make sure you get a daylight bulb for this.

Typical swing arm Fluorescent Lamp with desk clamp – Make sure you get a daylight bulb for this.

A Clear View

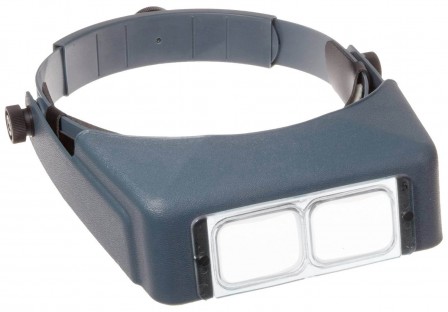
This next item is optional and also somewhat dependent on you and your lighting choice and work situation. If you’re an older gamer/hobbyist you’ve probably noticed that those tiny details are probably getting a bit harder to see. I find myself getting a lot more squinty these days so I’ve had to look for some solutions. I was using a set of cheapo drugstore magnifiers/reading glasses and then stumbled across the Donegan OptiVISOR. This is a magnifying visor with an adjustable headband that you can wear over your prescription glasses if need be. The lenses are replaceable and you can buy several different sizes of magnification. These take a little getting used to but once you have them fitted correctly you hardly notice they are there and the visor part moves independently of the headband so they can be flipped up out of the way if necessary.

Donegan OptiiVISOR with replaceable lenses

Donegan OptiiVISOR with replaceable lenses

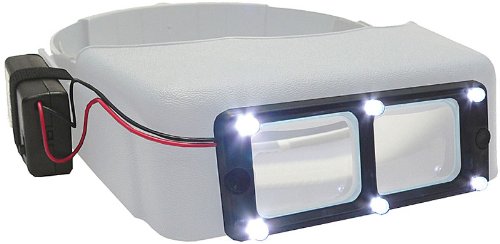
There’s also an accessory for the OptiVISOR that I really like. It’s an LED light kit that attaches to the lens plate and has 6 bright white LEDs that really throw some spot illumination on your subject for those times you need to see some up close detail. This accessory comes with everything you need to mount it and it only takes about 5 minutes to install. It’s powered by double A batteries which are easily replaceable. Once you’ve installed this you don’t notice that it’s even there, until you need it. This gives you portable light when and where you need it and can easily be throw into a travel tool kit if you need to.

The OptiVISOR LED Light Attachment

The OptiVISOR LED Light Attachment

Razor Saw

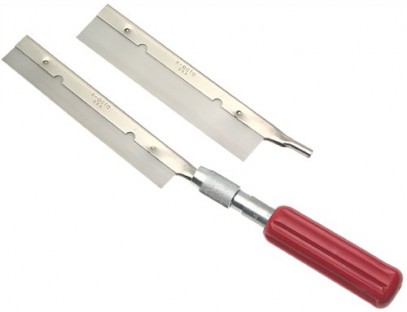
Another tool I like to have around is a Precision Razor Saw. Some of the tasks you’ll use this for will be cutting parts off of thick resin sprues, cutting molded bases off of miniatures or customizing and kitbashing models. These aren’t too expensive and if you purchased a knife set with a large handle you can just buy these X-Acto blades separately. If you’re going to be sawing wood or plastic for terrain construction or kitbashing, consider adding a mini miter box to go with your saw.
X-Acto Razor Saw Set

X-Acto Razor Saw Set

Motoring Along

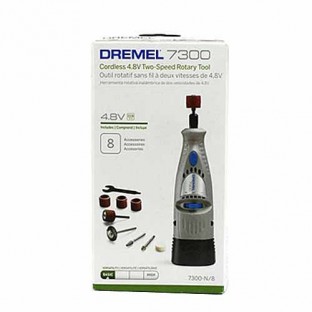
You may be considering adding a Dremel type tool to your kit and I think that can be a handy tool. Keep in mind that those things run at high speeds and can quickly damage what you’re working on or get away from you. For that reason I really like the Dremel MiniMite. The MiniMite is a cordless version of the Dremel that fits well in your hand and runs at a slower speed, making it easier to control. It’s also portable and rechargeable. It accepts all of the usual Dremel rotary tool accessories as far as I’m aware. The best part? It’s only about twenty five bucks on Amazon and ships for free.

Dremel 7300- N8 MiniMite Cordless Rotary Tool

Dremel 7300- N8 MiniMite Cordless Rotary Tool

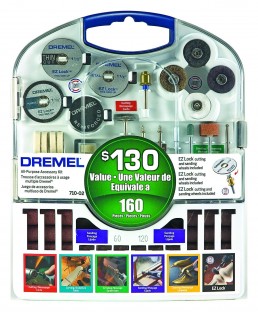
If you think you’d like a larger, more powerful, yet still portable tool, check out the Dremel 7700 Cordless Moto Tool. The Dremel 7700 does cost about twice as much as the MiniMite though. You’ll want to accessorize your Dremel with some attachments so check out a couple of the accessory kits, I have this 160 Piece Dremel Accessory Set which covers pretty much any eventuality.

This Dremel 160 piece accessory set probably  covers every task you're going to want to do with a moto tool

This Dremel 160 piece accessory set probably covers every task you’re going to want to do with a moto tool

Hold On!

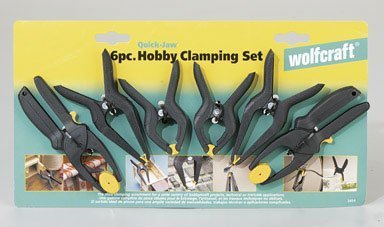
Sometimes you wish you had a third – or fourth – hand. There are a couple of tools you can get that are almost like having some extra hands around to help you out. The first one is some small spring clamps. I have some similar to these Wolfcraft Hobby Clamps that I picked up a long time ago. My only complaint with the set I have that they are a bit stronger than I’d like and they’re all exactly the same size and shape. This Wolfcraft set actually includes some different styles of clamp and looks a little more suited to what we’re doing. I’ve ordered a set and will post my thoughts on them after I’ve had a chance to work with them some.

The Wolfcraft Hobby Clamp Set comes with a variety of different style clamps that will come in handy

The Wolfcraft Hobby Clamp Set comes with a variety of different style clamps that will come in handy

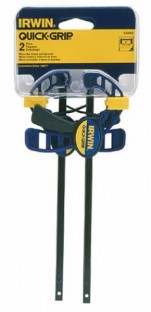
The next item is also a clamp but it’s a larger, different style of clamp that you may need if you’re making terrain or assembling some of the larger model kits like tanks, flyers, or laser cut buildings. This is a sliding bar clamp that comes in a mini size with a maximum four inch jaw opening. It’s just the right size for a lot of larger hobby projects without being ungainly and taking up your whole desk. These are available at Amazon in a two pack but hold the phone – Harbor Freight carries these for a mere two bucks apiece and you can buy them indiviually. I’ve looked around the ‘net and I haven’t found anywhere cheaper than these. Worth a stop by your local Harbor Freight if you have one nearby.

Micro Bar Clamps - these are great for holding larger models or terrain projects together while gluing and assembling

Micro Bar Clamps – these are great for holding larger models or terrain projects together while gluing and assembling

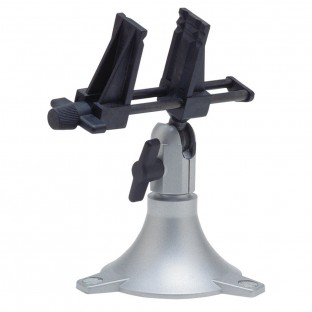
The last “third hand” type item I’m going to recommend is a little hobby vise with a set of wide jaws. This is the PanaVise Model 201 Junior and it has a nice solid base, fine controls for adjusting the vise jaws and it tilts and pans every which-way. You can also get a couple of different attachable bases for this vise. There’s a wider base that has little parts trays around the circumference and there’s also a vacuum base version of the PanaVise Junior that’ll keep the vise from sliding around on your desk/work surface.

The PanaVise Junior Miniature Vise

The PanaVise Junior Miniature Vise

The Brush Off

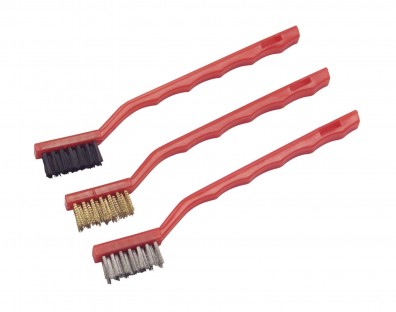
Last but definitely not least, you should probably pick up a couple of small brushes for clean up. These are handy for cleaning up your needle files if they get jammed up with the shavings from cleaning and smoothing model parts. I have a three piece mini wire brush set like this one. It includes a nylon, brass and steel brush. I’ll be honest with you, the steel brush is usually overkill for most hobby projects so I don’t use it much but the brass and nylon brushes have really become essential tools for cleaning other tools and miniatures.

This Mini Brush Set is great for those little cleanup jobs

This Mini Brush Set is great for those little cleanup jobs

There are probably a few other items that I could mention but these items are among the most frequently used in my experience. I think the two key items in this list are the cutting mat and good lighting. You’ll probably want to start with those and then add the other items as you need them.  As always, if you’d like to add a helpful tip or observation, feel free to do so down below in the comment section or find me on Twitter @HolyCrapItsLate. Next time we’ll take a look at the stuff that holds things all together, glue!

May 022014
 

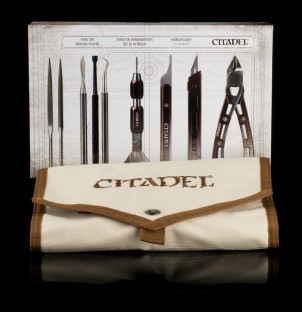
Last week we took a look at Pin Vises and I talked about how to get a complete miniature pinning kit for around $25 instead of throwing money away on an  overpriced Games Workshop Drill Set. I mentioned in that post that there were some other approaches to getting yourself a complete set of hobby tools that don’t require you to shell out $150 for Games Workshop/Citadel branded stuff.

Now don’t get me wrong here, I’m not a “GW Hater”. To the contrary, I’ve been playing GW games for 20+ years and I really enjoy the worlds they’ve created, warts and all. My issue is that hobby gaming is already a fairly expensive pastime that has a way of sneakily “nickel and diming” you into spending more than you think you will when you start out. It seems crazy to me to blow the insane amount of cash on tools that GW tries to convince new miniature hobbyists that they should spend. GW gets away with this because people coming into the hobby sometimes don’t know any better.

The Games Workshop tool set that you don't need to blow $150 on

The Games Workshop tool set that you don’t need to blow $150 on

A Word About Methods and Tools

This article is based on my experiences building miniatures and models over a couple of decades. I’m not claiming that my way is the only way, just showing you how I do things. One of the best things about this hobby is the community and how folks are willing to share their techniques and tricks of the trade and I sincerely hope you find something useful here. I welcome your input and observations so feel free to add anything you think is helpful down below in the comment section.

Before we get started, a quick word about tools. I’m not a tool snob, nor am I a frugal gamer (can anyone in this hobby really be considered frugal?). Since this article is about getting the most bang for your gaming buck I will be recommending some fairly inexpensive items. A few of them will be from Harbor Freight Tools. Some folks think anything from Harbor Freight is junk and to be fair, if I was a contractor or a mechanic I probably wouldn’t rely on some of the stuff they sell. However for the purposes of what we’re doing Harbor Freight Tools is a great place to shop for hobby tools. For convenience, I’ll also link to similar items that are available on Amazon.

The Basic Tools Every Beginner Needs

To get started you’re going to need a few basic items like a knife set, some files, and a sprue cutter. These items are your core tools and what you will rely on most of the time.

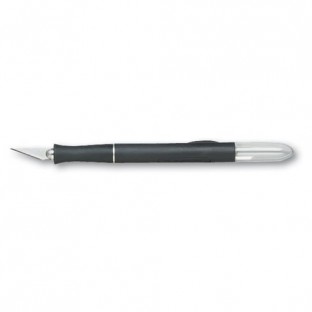
This is an X-Acto X2000 Comfort Grip Knife with a #11 Blade and it's less than $6

This is an X-Acto X2000 Comfort Grip Knife with a #11 Blade and it’s less than $6

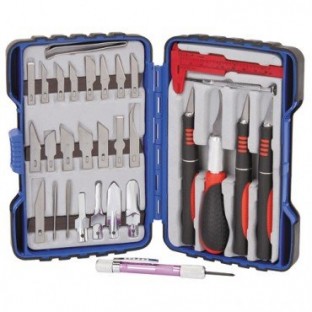
For knives it’s pretty straightforward, you’ll need a basic X-Acto style handle and some number 11 blades. Games Workshop sells one of these that also includes 5 replacement blades for $25 and to be quite blunt, that’s outrageous. If you’re shopping for a hobby knife you can either buy just a knife and some blades for around $10 or you could go with one of these Xacto Basic Knife Sets that’s got not one but three different handles and a variety of extra blades. The Amazon price for this is $16.29. Harbor Freight carries a 33 Piece Deluxe Hobby Knife Set that’s usually priced at $15.99 but is currently on sale for 13.99. The Harbor Freight set also includes some useful additional items like tweezers, a scratch awl, calipers and some tiny screwdrivers. You can also find the Harbor Freight set on Amazon here.

The Gordon 33 Piece Deluxe Hobby Knife Set with Carrying Case and a slew of  extras. Available at Harbor Freight Tools and Amazon

The Gordon 33 Piece Deluxe Hobby Knife Set with Carrying Case and a slew of extras. Available at Harbor Freight Tools and Amazon

One last knife set I want to mention is this Mastergrip Craft & Hobby Knife Set. I mentioned this via my Twitter account last week and Costco has had these for quite awhile. It now looks like they’re no longer available at Costco.com and are on clearance at the warehouses. This set was $20 and at my local warehouse it is now on clearance for $13. Twitter friend @D3FFDR3AD found the same set at his local Costco for 10 bucks! These probably won’t be available at Costco for much longer but it’s worth a look at your local store if you happen to be a member.

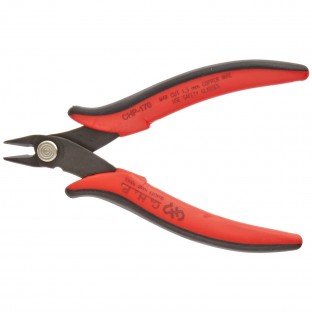
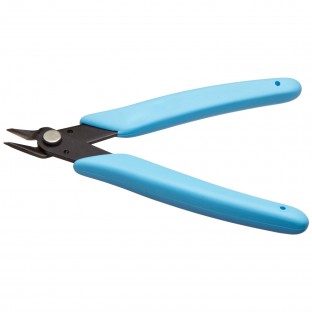
Next up, you’ll need a set of cutters to clip all of those parts away from their sprues. Once again, Games Workshop has a set on offer for the astronomical price of $30. But they’re “precision made from stainless steel and have bypass micro-shear blades”…right. They’re angle cutters and you can get some for under $10. In fact unless you’re set on a name brand tool you can get a set of these for way under $10. Check these Hakko CHP-170 Micro Clean Cutters available on Amazon for $4.37! These will do the job and have the right angle to get at those tiny parts cleanly. Over at Harbor Freight you can get these Micro Flush Cutters for three bucks, I’ve seen these on sale there for $2 bucks on occasion and I don’t think you can beat that price anywhere.

Hakko CHP-170 Micro Clean Cutters Sprue Cutters

Hakko CHP-170 Micro Clean Cutters

Update 5/7/14: It’s been suggested to me by more than one reader that I mention these Xuron 170-II Micro-Shear Flush Cutters as these are widely available in lots of hobby and game shops and are a popular choice among hobbyists. At the gamer friendly price of only $7.68 they are also another great deal in comparison to the Citadel Cutters.

Xuron Micro Shear  170-II Flush Cutters

Xuron Micro Shear 170-II Flush Cutters


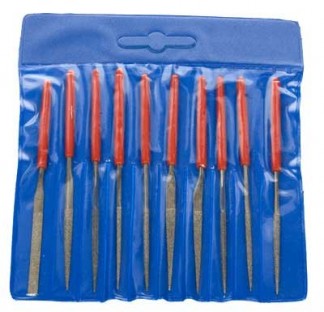
Lastly as far as basic tools go, you’ll need some files for mold line removal and prepping parts where they join together. Games Workshop is happy to empty out the rest of your wallet to the tune of $18 for a pair of needle files, but these files were probably blessed by the Emperor or something so you know, premium pricing. OR…you could get a set of these non-consecrated needle files that come in a pouch and have handles, and did I mention this is a ten piece set? It’s $7 on Amazon. That’s 10 files in various shapes with plasti-dipped soft grip handles. Harbor Freight also has some needle file sets (probably imported from the Eye of Chaos, but whatever) that are dirt cheap. There’s a set without handles that’s $3.49 and a set with plastic handles for $4. Both of these also come in a handy vinyl pouch.

The SE 10 Piece Needle File Set

The SE 10 Piece Needle File Set

The Extra Bits

For completeness, there are a few other tools that you should eventually get but they aren’t strictly necessary for beginners. First up is the Mouldline Scraper – once again GW has one of these, and it’s $17. This tool is strictly optional and to be honest, you don’t need it. It does the same thing your file set does and if you bought one of those knife sets I mentioned above that come with multiple handles and blades you can designate one of those as your mouldline scraper. Personally I use the back of a knife for most of these tasks. If you absolutely have to have a tool like this then I recommend this Squadron Products Seam Scraper. It’s 10 bucks which still feels a little pricey to me, your mileage may vary.

Squadron Products Seam Scraper

Squadron Products Seam Scraper

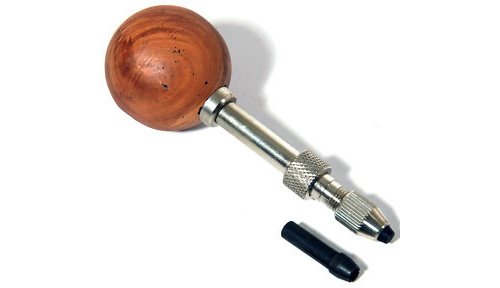
The next thing you’re going eventually need is a pin vise/drill. I wrote a post on that subject that goes into great detail bout how you can put together a complete kit for pinning models together for less than the cost of the stupidly priced Citadel Drill so I won’t repeat all of that here. For our purposes, this is the pin vise I use and it’s $8 from Amazon. It doesn’t come with drill bits but see my other post for some recommendations. Surprisingly, this is one of the few things for the hobbyist that Harbor Freight does not offer.

Amazon Pin Vise Drill

This is the pin vise I use, it costs $8 at Amazon

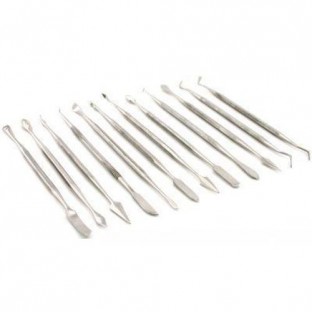
Our final comparison item is the Sculpting Tool Set. This is really optional and you probably wont need this as a person just starting out in the hobby. I do like to use the spreader for basing materials sometimes so it does have uses other than sculpting. Harbor Freight has one listed for $6 and it includes 6 different tools. It’s the 6 Piece Stainless Steel Carving Set and it has a nice variety of shapes and sizes. It’s really a much better value than the Games Workshop Sculpting Tool Set which has two tools and will set you back a ridiculous $25. You can also find this 12 piece sculpting set on Amazon for around $9 – check the various options here, some are free ship and some are free for Prime members but they’re all right around $9.

SE 12 Piece Sculpting Tool Set

SE 12 Piece Sculpting Tool Set

And The Winner Is…YOU!

So we’re at the part where we sum up how much our tool set costs us and compare it to what Games Workshop has on offer. Since I offered up some different options I’ve sort of averaged the cost here a bit, rounding up to give a little room for price fluctuations (keep in mind that prices on Amazon change daily, sometimes even more frequently). Lets take a look:

Knife Set – $16
Sprue Cutters – $5
File Set – $5
Mouldline/Seam Scraper $0 or around $10 (Completely optional and you can get by without one of these)
Pin Vise – $8 (You’ll need to add some drill bits but see my other article first)
Sculpting Tool Set $8

Total = Around $40 – lets say $50 if you throw in a micro drill bit set instead of building the complete pinning kit.

I just saved $100 on hobby tools in 15 minutes!

I just saved $100 on hobby tools in 15 minutes!

That means you’ve just saved a whopping $100 for your tool set compared to what Games Workshop has on offer. Sure, you didn’t get that nifty cloth roll up to carry your tools around in but I’m betting you have something around the house that will work or you can hit your local sporting goods store and find something there for about five bucks. You might even consider checking out etsy to see if someone there can make you the custom roll-up tool pouch of your dreams.

Saving that $100 means you have more money for actual miniatures and models, or you could expand your tool set with some other useful tools. In my next post I’ll show you some other items that I think are good to have in your hobby tool box. As always, feel free to ask questions and/or leave constructive feedback below in the comments section.